
In this part of the course, we will download FMOD, and then we will take a look at its basic interface. You will learn about the workspace, timeline, events, mixer window and a couple of other things.
2. An Introduction to FMOD Interface
Before we learn how to use FMOD to give our game music more interactivity, it’s a good idea to take a look at some of the elements of the FMOD’s interface.
FMOD is a middleware type of software – at first glance, it looks like a normal DAW: Digital Audio Workstation. But in reality, it cannot act as a DAW on its own. This means you can’t export any sounds out of it, but we use FMOD to control the behaviour of sounds within the game engine, such as Unity.
A project in FMOD is then integrated with the project in engine editor (Unity in this case), and in this way, these two pieces of software work together.
- You can download FMOD for free here: https://www.fmod.com.
First, you need to create an account. Then, you need to login to your account, and go to the Download page here: https://www.fmod.com/download.
You will see the following page with four tabs:
- FMOD Studio – the actual FMOD program.
- Integrations – integration packages for Unity and Unreal Engine
- Plugins – additional plugins.
- Demos – an example project showing you different ways to use FMOD.
Figure 2.1
For now we’re interested just in the FMOD Studio tab, where you will find an install package for your OS. Choose the right version and download the install package, by clicking the green button that says Download.
Install the package like you install all other programs on your computer. After installing FMOD, you’ll find the launch icon in the Start menu (Windows), or in the launchpad (Mac). Click the icon, and open FMOD.
We open FMOD as a separate program – so when you work with Unity, you have both the Unity editor and the FMOD studio open at the same time. Then, we save the FMOD project in FMOD and integrate it with our Unity project. We can have both program open and work on our game at the same time, saving and building FMOD project, and then waiting for Unity project to refresh. Don’t worry if this isn’t clear right now. After reading this guide, everything will become clear.
After launching FMOD, you will see a window like the one on figure 2.2, where you can choose the project to open.
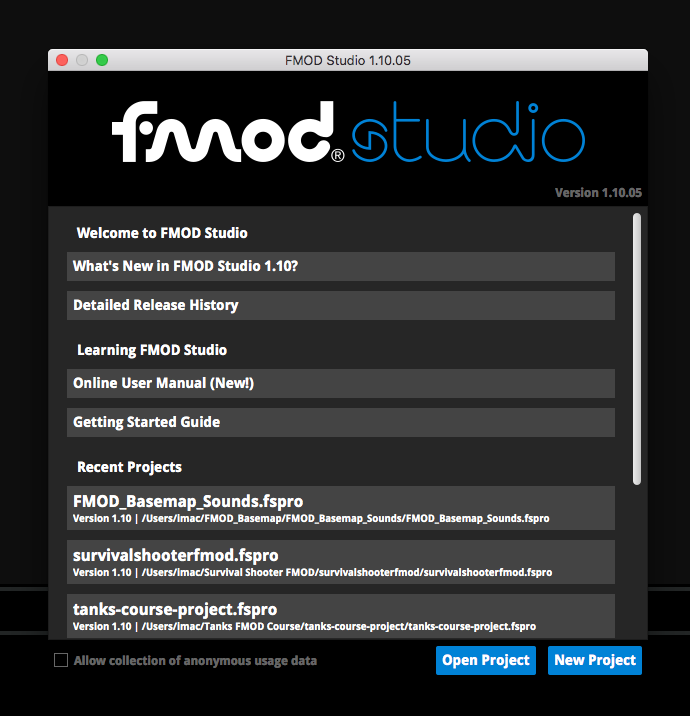
Figure 2.2
For each game (that is, for each Unity project), we create a separate FMOD project. We add sounds and music to this project, and we edit them in FMOD. Then, we integrate FMOD project with Unity project.
To create a new FMOD project, click the New Project button. The window will close and you will see some empty panels of the editor itself. Save the project by clicking the File | Save as… in the main menu.
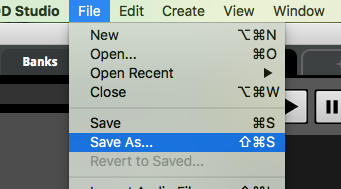
Figure 2.3
Save the project anywhere on your hard drive. The next time you open FMOD, this project will be visible in the list of all the projects you can open.
Now there’s something you need to know – saving the project is one thing. But you also have to integrate it with Unity, and build it. Later on I will show you how to do this, but for now just remember that there are three steps: save the project, build it and integrate it.
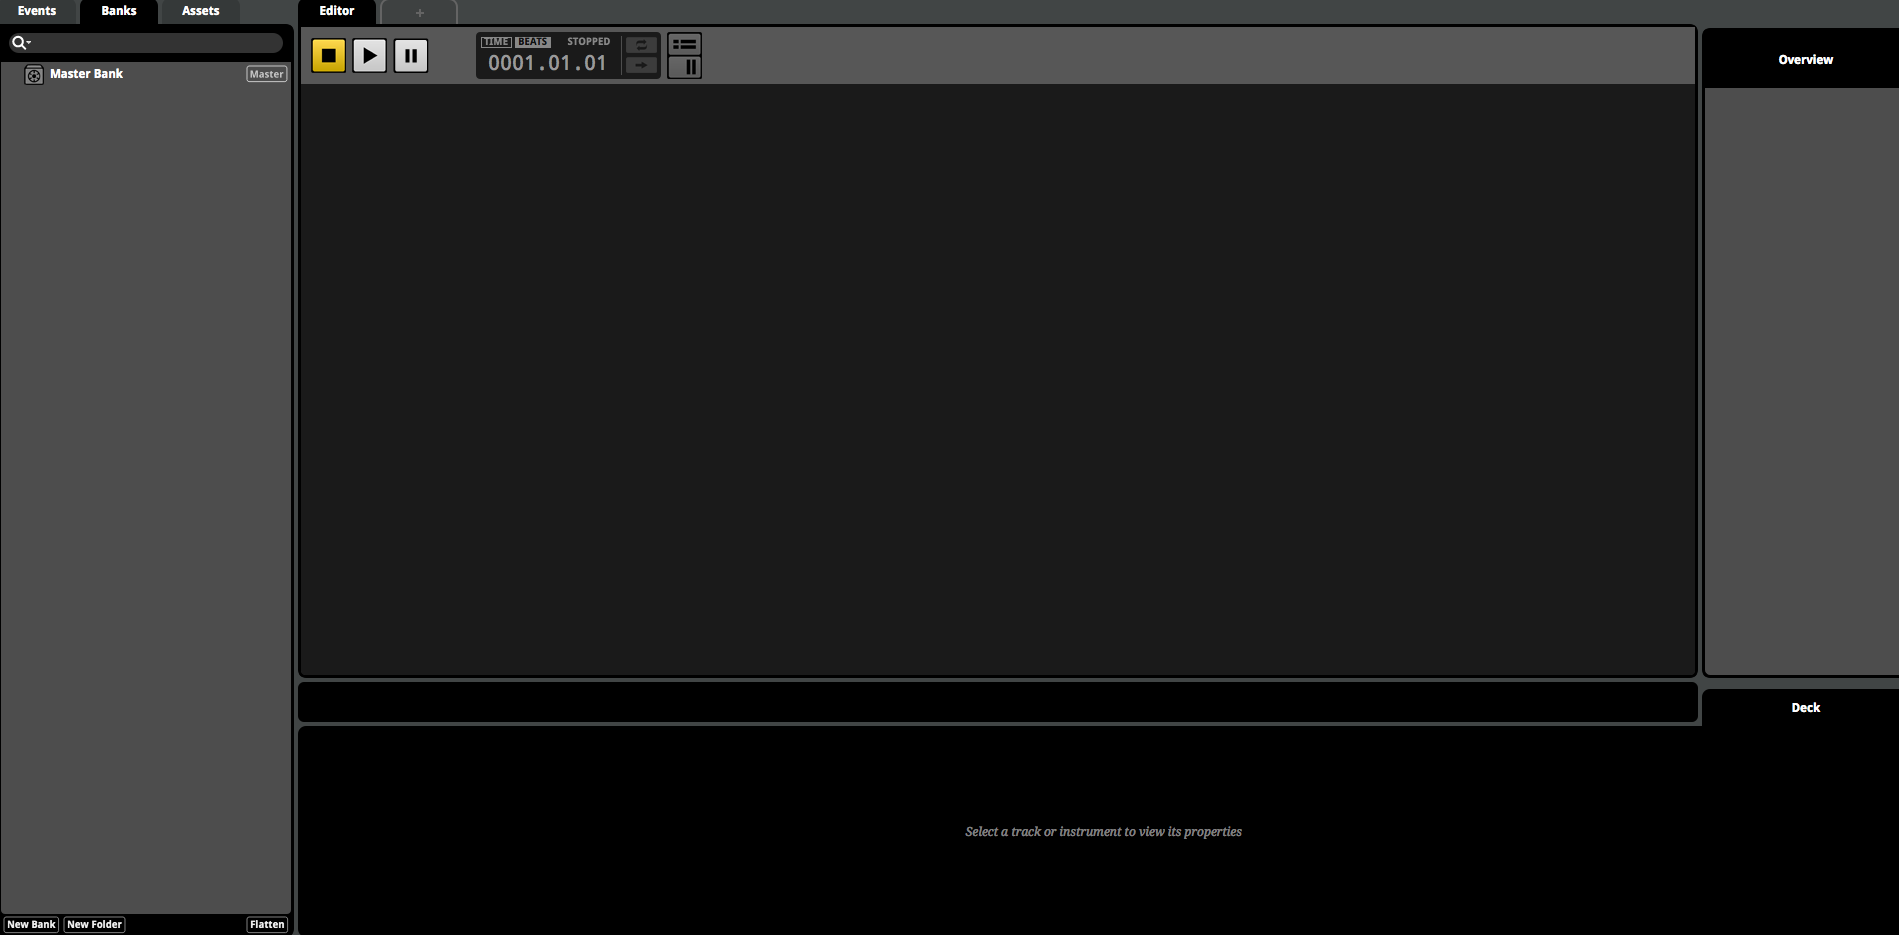
Figure 2.4
Figure 2.4 shows some basic elements of FMOD. The panel on the left contains three tabs.
Events, Banks and Assets in FMOD
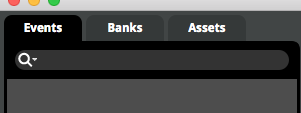
Figure 2.5
What are these tabs for?
- Events – this is a list of all events.
- Banks – this is a list of folders (banks) of files, which are then imported to Unity project.
- Assets – this is a list of all the assets. Assets are all the sound files imported to this FMOD project.
These tabs represent the basic logic behind FMOD. Assets are sound files which we import into our project, by placing them in the Audio Bin.
Events are like micro-projects which you create in a normal DAW – you load sound files into them, create tracks, and add effect.
An event is an “entity” which is made of individual files or groups of files we call modules. We can play these events (call them) from our game engine through scripts or Unity components. But an event is not a single sound file. This is because an event can contain many different sound files, called in various moments of the game, along with their effects such as limiters, EQ or compressors. A single sound file is called a module. Modules can also store multiple sound files.
Banks are folders with files. Each event must be assigned to one of the banks, because these banks are then loaded into the game. If the event won’t be assigned to a bank, it won’t be accessible from Unity editor. You can create your own banks that will be accessible in Unity.
Let’s take a look where we add our sound files.
Audio Bin in FMOD
From the main menu, choose Window | Audio Bin.
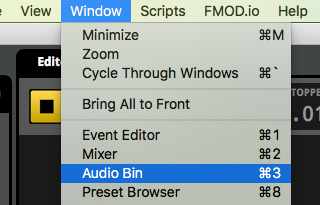
Figure 2.6
This will open an Audio Bin window.

Figure 2.7
This is an Audio Bin window, the main folder with sound files. You can drag and drop all audio files you want to use for your project into this window. Figure 2.7 shows an open Assets tab. This is the same tab that you’ve seen earlier, next to Events and Banks tabs. You probably know by now that you can also drag and drop audio files directly into the Assets tab in the left panel of the editor without opening Audio Bin.
In Audio Bin, by clicking the right mouse button, you can create folders to put your files into. After selecting files and clicking blue region at the bottom of the Audio Bin or at the bottom of the Assets panel, you can change encoding and settings of your files. It’s good to know that compressed files are loaded in compressed form into the memory, while uncompressed files are loaded at play. This second option requires more CPU power. Decompressed files are loaded entirely into the memory, but do not require too much CPU power. Finally, streamed files are played from the hard drive. Files that are longer than 10 seconds are automatically set as streamed.

Figure 2.8
Compression and encoding happens after building the project (when you click File | Build).
The second tab in Audio Bin is FMOD.io. This is a project run by the company behind FMOD, it’s a bank of audio files that you can buy for your own project. If you have an FMOD.io account, Audio Bin window will give you access to all your purchased files.
Now drag and drop any audio file you want into Audio Bin. You may even drop a random file from the package for this book.

Figure 2.9
After dropping the file, you’ll see its name in Audio Bin window, like you can see on figure 2.9. The tag #unused tells us that the file has not be used yet in any event. You can also load files into FMOD project by choosing File | Import Audio Files from the menu. After loading some files this way, an Audio Bin window will open automatically.

Figure 2.10
Now you know how to add audio files to your project. Let’s move on.
Events Editor
Keep the Audio Bin window open, and then right-click in the left panel of the FMOD editor, in the Events tab.
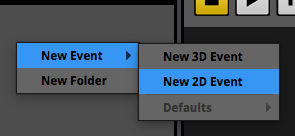
Figure 2.11
From the menu, choose New Event | New 2D Event. This will create a new event, and you will see it in the left panel. For now there’s no need to change its name. Close the Audio Bin window now. Right-click on the name of the new event and from the menu choose Assign to Bank | Master Bank.
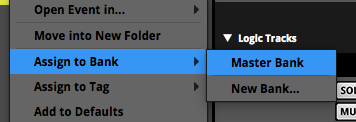
Figure 2.12
This way, you can assign the event to the Master Bank. You have to do this with every event – if the event won’t be assigned to a bank (and you can create your own banks), it will not be available in Unity project.
FMOD allows you to create two types of events – 2D and 3D events. A 2D event is an event that has the same intensity of sound regardless of the three dimensional space of the game. 2D events are usually used for music soundtrack or for sounds that should not change no matter what is happening in the three dimensional space of the game.
3D events are subjects to the three dimensions. We use 3D events for sounds that can and should become louder or quieter depending on the distance between the sound source and the sound listener.
In other words, we use 2D events for things such as background music, and we use 3D sounds for thing such as a car that is getting closer to the player over time.
Left-click on the even you just made in the left column, thus selecting it (if it wasn’t selected already). The main work space in FMOD is the event editor. It’s quite familiar to every person who ever worked with a DAW.
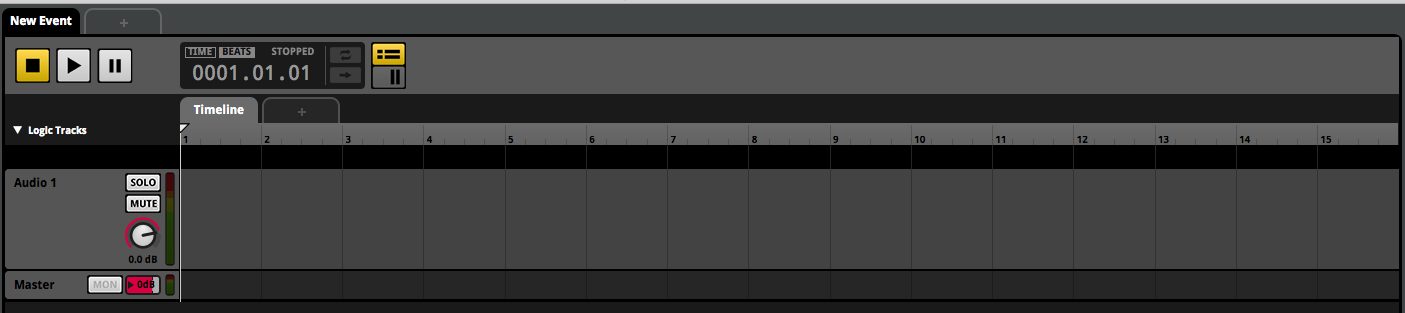
Figure 2.13
Next to the name of the event at the top of the editor, you see a “plus” sign, +. It allows you to open a couple of different events in separate tabs. Below the tabs you see the main audio control panel with familiar buttons.

2.14
On figure 2.14, from the left, we have:
- The square button stops the audio.
- The triangle button plays the audio.
- The double bar button pauses the button.
Thus, you see these are quite standard buttons that control the playback of the audio.
The darker region on the right, beside the timer, has two additional buttons: Time and Beats. These two buttons allow you to switch the timeline between the beats, and the time. Thanks to this option, you can work with the sounds in the context of separate bars, or passing seconds.
Below the control panel, you see the tracks editor.
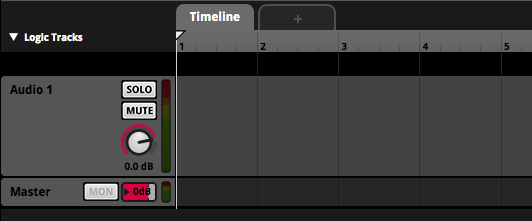
Figure 2.15
The tracks editor is similar to any DAW tracks editor, but in FMOD we have a couple of additional functions. Let’s start from the top. The Timeline tab is the basic view of the track – this is where you can see the division of the track by seconds or by beats and bars, when switching Time and Beats buttons mentioned earlier.
With yet another plus button, +, you can add new parameters – these are logic elements that allows us to control the sound in Unity through C# scripts. Parameters can be added in a different way, too, never touching the + button, and we’ll cover all these techniques later on.
The black region between the timeline itself and the first Audio 1 track is the logic tracks region. For now it’s empty, so you may have troubles figuring out which region I’m talking about, but later on we will add markers and logic controls and loop regions here, that will allows us to control the logic of the sound.
Audio 1 is the name of the first track. You can change this name. Each event can contain many different tracks. But the Master track, visible at the bottom of the tracks editor, can be just one for each event. Each track has Solo and Mute buttons that allow you to solo the track, or mute it completely. Each track has its own volume knob, as well, which you can see on figure 2.14 as set to 0.0 dB, which means the volume level is normal.
Let’s open the Assets tab now, in the left panel. You will see the audio file you dragged and dropped earlier into the Audio Bin window. Now click and drag this file to Audio 1 track. A single audio file dragged onto the track is called a module. You can place many different modules on a single track.

Figure 2.16
Now, by holding and Alt key on your keyboard and using the mouse wheel, you can zoom in and zoom out the track itself.
Click the left mouse button on the module, and while holding the left mouse button, drag the module left or right on a single track, or up and down between the tracks. By clicking in any place of the timeline (or, well, beatline), you can place the playback cursor anywhere on the track.
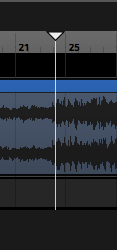
Figure 2.17
By right-clicking the module, you can open its menu, where you can choose a color for each module. The same technique can be used to choose a color for each track, but remember, that track color and module color are two separate colors. During the playback, a separate, more intensive cursor shows the current place of the audio being placed, while the more transparent cursor shows the start region of the playback.
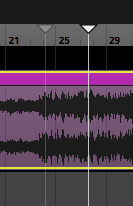
Figure 2.18
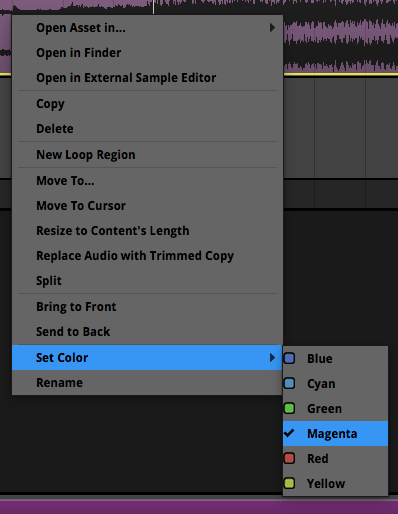
Figure 2.19
While working with an event, on the right panel you will see the notes region.
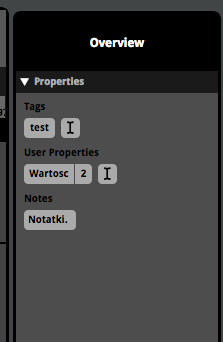
Figure 2.20
Here you can add Tags, User Properties and Notes. You can later use these three things to use the search function to search for specific event. The search input field is visible on the left side, below the Events, Banks and Assets tabs. Adding notes is quite useful when you work with multiple files, or when a single project is edited by many people. Such notes can be then used as an additional documentation.
At the bottom of the editor you can see a dock and events panel. If you select no event nor module, the dock shows settings for the Master track by default.
Selecting a track shows a similar dock, in which you can use plus + buttons to add new effects such as compressor or EQ.
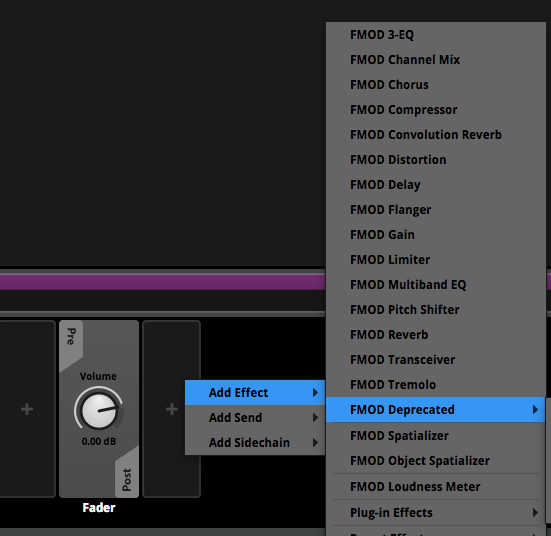
Figure 2.22
Selecting a single module will display a different dock.
Figure 2.23
On the left side of the dock you’ll see a white arrow. Clicking it expands and hides the control panel of the selected module. In this panel you can control the probability of the sound being played, conditions for triggering the sound, volume, transitions and pitch. We’ll cover some of these things in this book.
Now, let’s learn about the mixer.
Mixer in FMOD
Click the Window | Mixer in the main menu, this will open a separate mixer window.
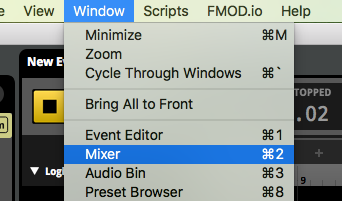
Figure 2.24
You can have multiple windows open at the same time, both the editor and the mixer, if you’re working on a couple of events at the same time. You’re limited only by the size and number of your screens.
Those of you who have experience working with sound, know very well what the mixer is used for. And remember, I did assume you do have experience working with sound. In FMOD, the mixer looks similar to the editor window. The names of the panels and tabs are slightly different, though.
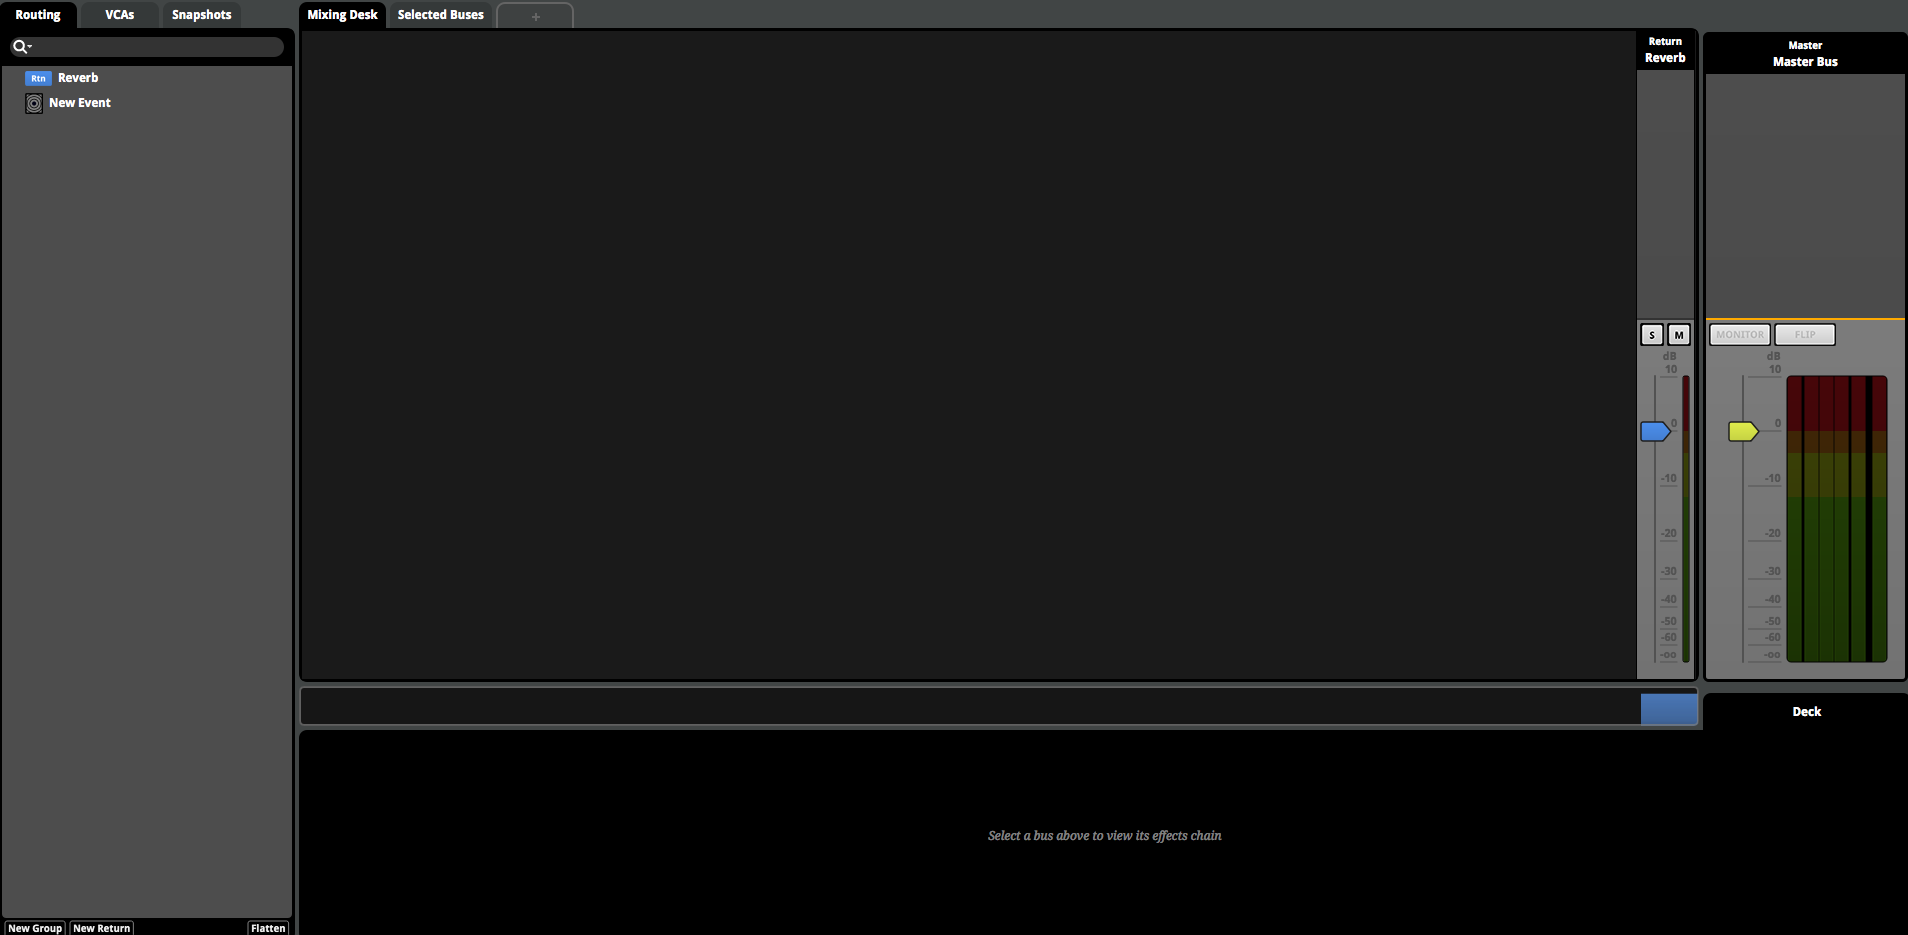
Figure 2.25
The left panel is a list of routing, VCA and snapshots.

Figure 2.26
This is what these things are:
- Routing – like the name suggest, here we route each event to a different bus of the mixer.
- VCA – it stands for Voltage Control Amplifier and it’s a signal loudness control. VCA is usually used to control the game audio settings, like different volume for game sounds, dialogs or music.
- Snapshots – they allow you to create and save specific mixer settings that can be called through scripts in Unity.
In the routing tab, you’ll see a list of all events that you have created for your project. You can group them, by creating groups and putting events in these groups. Here you can also create Return channels.
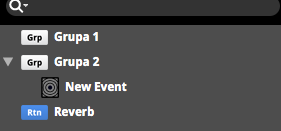
Figure 2.27
The groups are displayed in the workspace in the middle of the mixer screen.
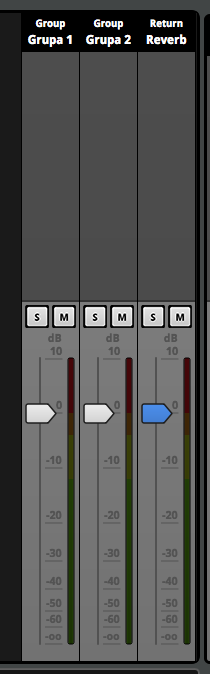
Figure 2.28
Each of these groups have standard controls – like sliders to control the volume, and solo/mute buttons. Like in case of the general editor, the groups themselves have their own unique dock area, where you can add effects such as EQ or compressor.
FMOD has a quite logical structure of the signal chain – the sound itself comes from modules and then it is directed into the track. The track is directed into the Master track, which leads to the mixer group, which goes to the Master track in mixer. On each of these stages you can add new events that manipulate the sound.
***
You’ve learned the basic elements of the FMOD interface now. Of course, not everything will be clear at the moment, but as we get into practice, you’ll learn more and realize that the interface and logic of FMOD are quite simple and easy to use. Now that we know the basics of the interface, we can get into practice.
First, we’ll create a new project in Unity, then a new project in FMOD and finally, we will integrate these two projects, while learning how to build the FMOD project at the same time.
Don't forget to become a fan on Facebook and subscribe to new posts via RSS or via email.
More from my site
 Interactive Game Music for Beginners with FMOD – Part 7
- Interactive Game Music for Beginners with FMOD – Part 6
- Interactive Game Music for Beginners with FMOD – Part 5
- Interactive Game Music for Beginners with FMOD – Part 3
- Interactive Game Music for Beginners with FMOD – Part 1
- Interactive Game Music for Beginners with FMOD – Part 4


