Welcome to the “How to Mix Orchestral Music for Beginners” series of tutorials! The first thing you’ll notice is the number “5.” next to “Mixing” headline. This is because this series is a natural extension of my “How to Make Epic and Orchestral Music” series. In this mixing series, we’re working on the very same track we made in that orchestral course.
This course is meant for beginners – it will explain the absolute basics of post-production, so your tracks can be ready for release.
5. Mixing
Mixing is the process of achieving balanced and clean sound of your track. Becoming a great mixer is not an easy task, but like with anything else in this book, we’re going to learn the basics to get you started.
Render to Stems
Before mixing, all the tracks should be rendered into stems. Basically, this means that you want to turn all your composed midi data into separate WAV files, for each of the tracks. This way, 1st violins will be saved as a single WAV, cellos will be another WAV, and French Horns will be yet another WAV and so on.
Mixing should be done on the rendered stems. It will save a lot of your CPU power. Refer to your DAW’s manual to learn how to render tracks, or follow this quick tutorial if you use Reaper.
From the main menu, select File->Render. A new window will appear, in which you can select rendering options, while still being able to click the individual tracks in the main workspace area.
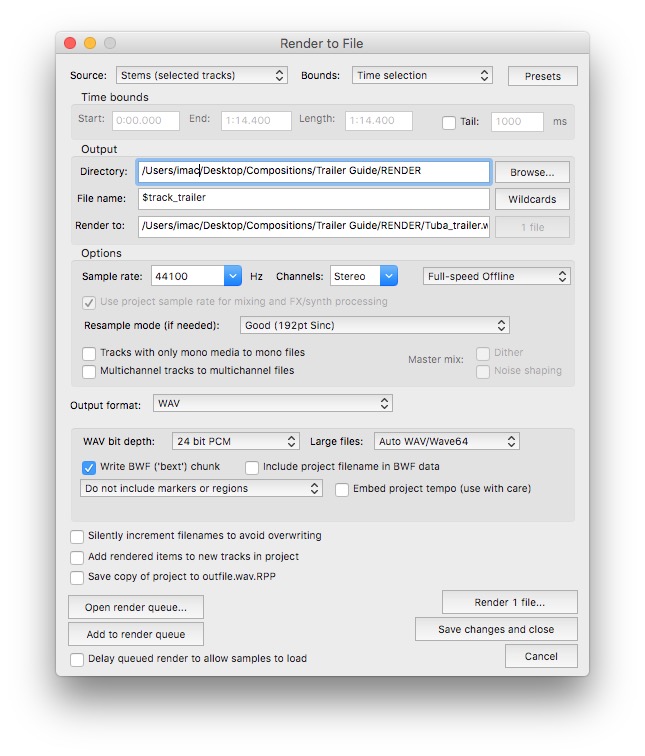
Figure 5.1
Set your render settings as shown on figure 5.1. Basically, I choose „Source” to be selected tracks – this way, I can click the tracks I want to render as separate files. I set bounds to time selection to render only a specific part of the tracks. I’ve set output format to be WAV, so the quality of the files will be much better than in case of compressed formats.
I’m naming the tracks (file name) $track_trailer – the _trailer part is the name I’ve typed myself, and the $track is a „wildcard”, which Reaper automatically replaces with the name of the track. This way, I will know which track is which, with no need to name the tracks manually. Finally, type the directory, where you want your files to be rendered to. These are the basic settings. Most DAWs will support them.
Now, go on and click CTRL+click on every track you want to render (CMD+click on MacOS). You want to render the Piano track, and all the tracks within the groups – they’re highlighted on figure 5.2. There’s no need to render the “Strings”, “Brass” and other group tracks, because they’re actually empty. You want to render only the tracks that have midi items on them.

Figure 5.2
Finally, make the time selection on the main timeline axis.I’ve selected a bit more after the midi items end – this way, the files will be rendered with any audio tail they contain (audio tail, meaning the slowly decaying sound that is still hearable after the note is played).

Figure 5.3
Now, click “Render X files” button in the render settings window.
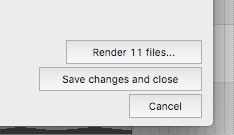
Figure 5.4
Despite the “11” on figure 5.4, our musical piece should have, give or take, 27 tracks. Render them all. WAV files are rather big due to the amount of data they store, but because they store all the necessary data, they’re perfect for mixing and editing further. Be prepared that a full scale orchestral piece 3 minutes long may be anywhere between 1-3 GB in size. Because every separate track can be 50-80 MB in size, and you may have 50 to 100 tracks in your entire project, this results in large sizes for your stems. The final render (a single final master track) will not exceed 100 MB, though.
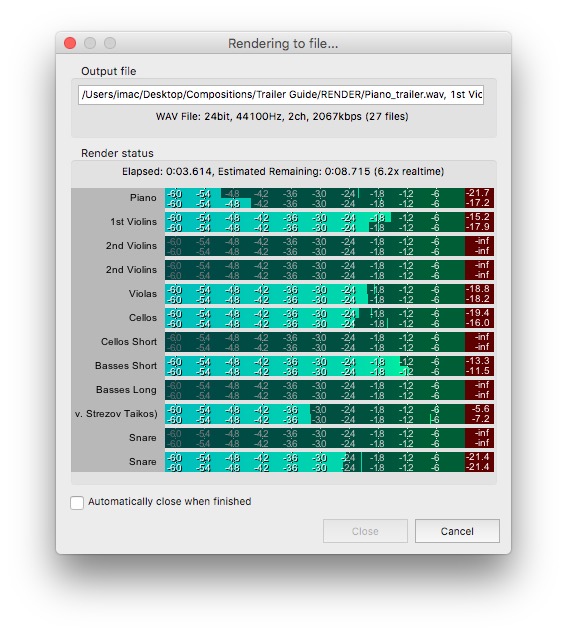
Figure 5.5 – Individual tracks being rendered.
Now that we have all our tracks rendered, we start start the mix.
Setting the Project
The rendered files must be put back to your DAW in a separate project. There are two basic approaches here:
- You can place all the tracks in your DAW, and then rename them, and organize them into orchestral sections again (strings, brass, winds and so on). Then you will load the necessary plugins one by one.
- You can create a mixing template that you will be using multiple times, and load each audio file individually to the corresponding track (1st violins, 2nd violins and so on).
There’s no right or wrong approach here, so choose the one you prefer. But note, that in case of the 2nd approach, whenever you reuse your mix template, be sure to set all the plugin settings to default, as well as any volume knobs you may have changed during previous project. You want to start fresh with each project.
In our case, we will do something a bit different – save your composition as a separate project. Then delete all the midi items, and delete Kontakt from every single track. Leave the tracks in the project.
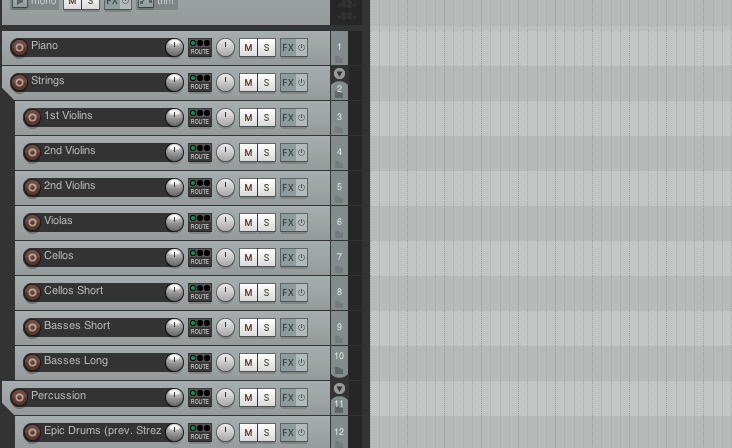
Figure 5.6
Figure 5.6 shows our previous project, saved as a new file (new project) with cleared midi data, and all the FX (Kontakt instances) deleted.
Now, open the folder with the rendered tracks, and simple drag the files to their respected tracks, like on figure 5.7. Do this for all the tracks.
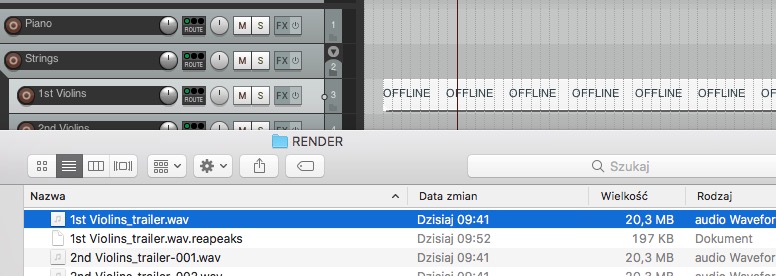
Figure 5.7
When I was done and I’ve loaded all the audio files, I colored the tracks to clearly see each section. In Reaper, just right click on the track’s control panel (on the left) and choose Track Color->Set track to…, like on figure 5.8. It’s a common practice to color the tracks – when you see where everything is, it makes life easier.
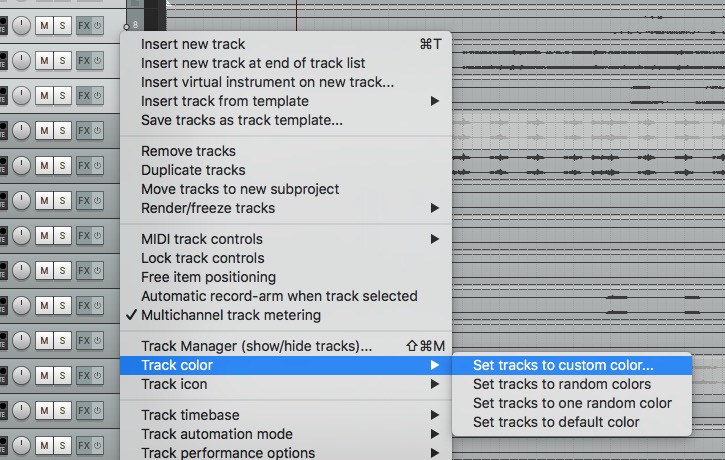
Figure 5.8
Figure 5.9 shows all the tracks added to our mix project.
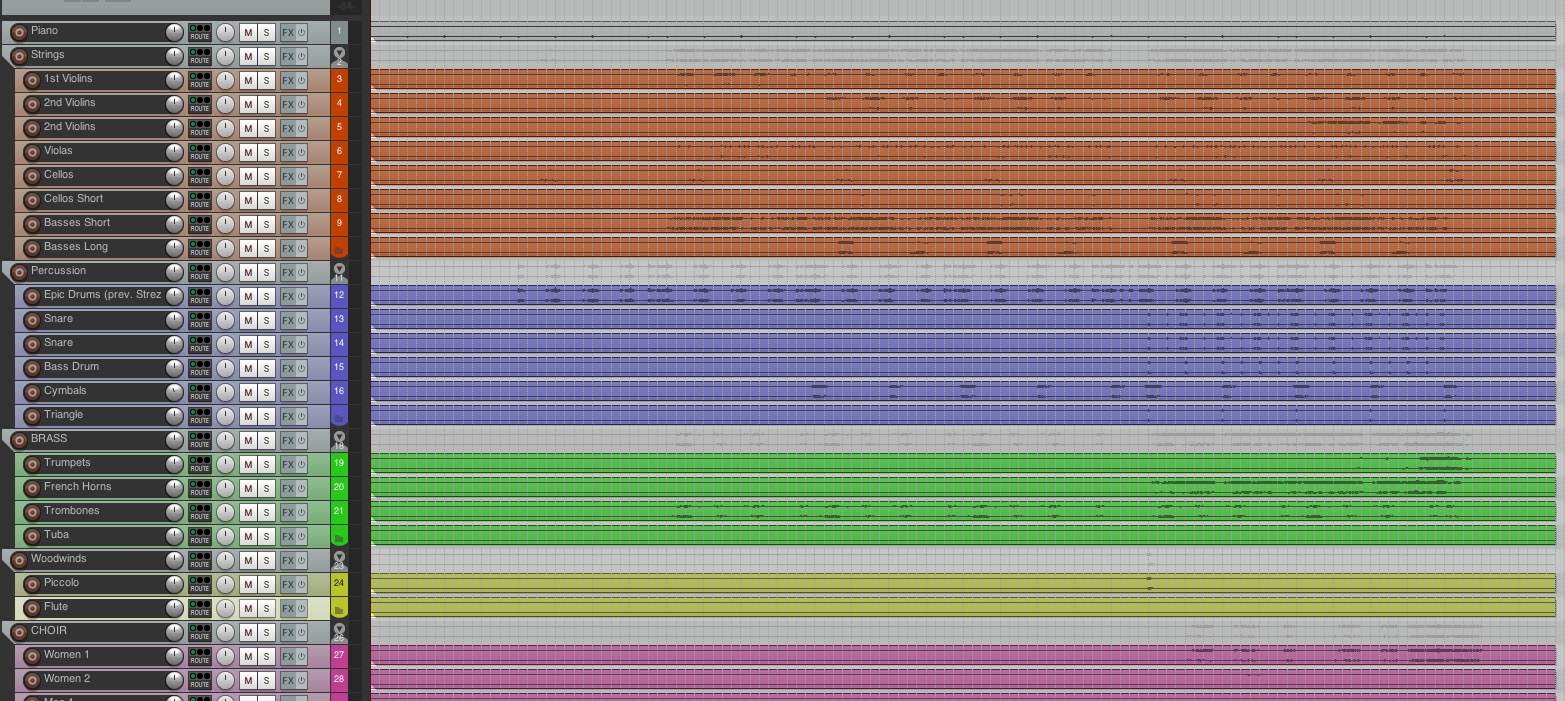
Figure 5.9
If you play the track right now, it may not sound right. Now we have to mix it, change some volume levels, add reverb, additional plugins, and pan every instrument based on its placement in real life orchestra.
We’re going to:
- Pan the instruments in the stereo spectrum, and play a bit with volume levels.
- Equalize the track using an Equalizer. We need to cut some frequencies to make the track clearer.
- We will add a single reverb effect.
- We will add a limiter, to make sure we won’t create sound distortions when things get too loud.
We will also learn how to work with DRY and WET signals for the final mix, and finally, we will render the finished track.
Panning – How to Pan an Orchestra
We will start with panning. We do not start with changing the volume of individual tracks, because panning an instrument will also change how loud you perceive it in the entire mix – so we start with panning, and balance the volume next.
Basically, when it comes to panning, we move our instruments in our stereo spectrum, so that they sound in both speakers, one of the speakers, or stronger in one of the speakers (left, right or in the middle). This adds to the realism of the track. In orchestral setting, on stage or in the studio, the instruments of the orchestra have their specific place.
For example, first violins are more to the left, while cellos are more to the right. Depending on the type of the orchestra, some things may vary, but figure 5.10 shows a general way we pan the orchestra.

Figure 5.10
Now, on the various figures throughout this book you may have seen different settings for panning. Ignore them, because it’s actually now that we’re going to pan everything as it should be.
Figure 5.10 shows percussion on the left, but later on I tell you place percussion in the middle – why? Well, there is no single standard orchestral setting. Sometimes, the trumpets are placed on the left, and the entire percussion section is placed in the very beck behind the brass, not next to it. Basically, you should stick to the percentage values I place below, while also considering figure 5.10. I’ll get back to this in a moment.
For example, on figure 5.11 you can see that Strings section and 2nd Violins are not panned at all yet, they’re set to 0. But the 1st Violins are already panned to 29% Left, using the circle pan control. I want you to pan your instruments in similar ways, using the percentage guide below.
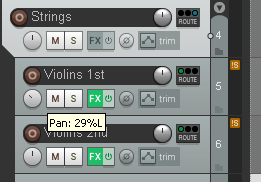
Figure 5.11
Now, change the pan controls of your instruments like this:
- Piano – 20% L
- 1st Violins – 30% Left
- 2nd Violins – 20% L
- Violas – 5% L
- Cellos – 25% Right
- Basses – 25% R
- Piccolo – 10% L
- Flutes – 10% R
- French Horns – 5% Left
- Trumpets – 5% R
- Trombones – 10% R
- Tuba – 25% R
- Low Pads – 0
- Epic Toms – 0
- Snare Drums – 10% Left
- Cymbals – 0
- Triangle – 0
- FX – 0
- Women – 30% L
- Men – 30% R
From now on you will hear that some instruments can be heard more in your left speaker, and some can be heard more in your right speaker. This also allows us to achieve greater realism, because when you sit in an orchestral hall, you can hear where each of the instruments is placed.
Let’s go back to this percussion thing – normally, snare drums or timpani or cymbals have their specific place in the orchestra, so when I use these instruments, I pan them traditionally. But taikos or other “epic” drums are not a part of a normal orchestra, so in this case I follow the old mixing rule: drums in the middle. That’s why I don’t pan the percussion, but I do so only for non-traditional instruments. The same goes for pads, or FX elements – I do not pan them at all.
Warning! Be sure to read manuals when you purchase a new instrument library, as you can find a lot of great stuff inside. For example, you may read that some libraries are already recorded with panning and in default mic settings you don’t have to change their panning yourself. This happens in case of Cinematic Strings 2 that I use – they are already panned, so when mixing, I do not pan them manually anymore.
The percentage values can vary from person to person (guide to guide, book to book), but generally speaking, the list presented earlier shows you how to pan the sounds. L stands for Left, and R stands for Right. 0 is of course zero, there’s no panning. Most DAWs use a circle control for panning.
Once you pan your entire project, it’s time to start working on the volume.
Don't forget to become a fan on Facebook and subscribe to new posts via RSS or via email.