
Before discussing vertical adaptive music in the next part of this course, we will spend some time learning about using FMOD to play random sounds, and then we will learn more about snapshots in FMOD.
5. Random Sounds and Snapshots
You know how to create interactive music now and how to call it using Unity scripts. Let’s add some random elements to our music now, and then let’s figure out how to use snapshots.
Random Sounds in FMOD
FMOD allows you to add random sounds by using multisound modules.
Multisound modules are be used not only for elements of our music, but also to increase the number of actual sounds for the same event: for example for footsteps, gun fire or sounds that are often repeated in the game. You want many of similar sounds to randomize them a bit to avoid the “machine gun” effect, in which the same sound is repeated over and over again.
Using multiple sounds and randomizing them deals with this problem.
Go to the Assets tab and select all the cymbals.

Figure 5.1
Drag all three files onto the Cymbals track of our event. FMOD will create a multisound module automatically. The module has a Playlist panel in its dock (visible after you select the module), and you can later on add new sounds to this module.
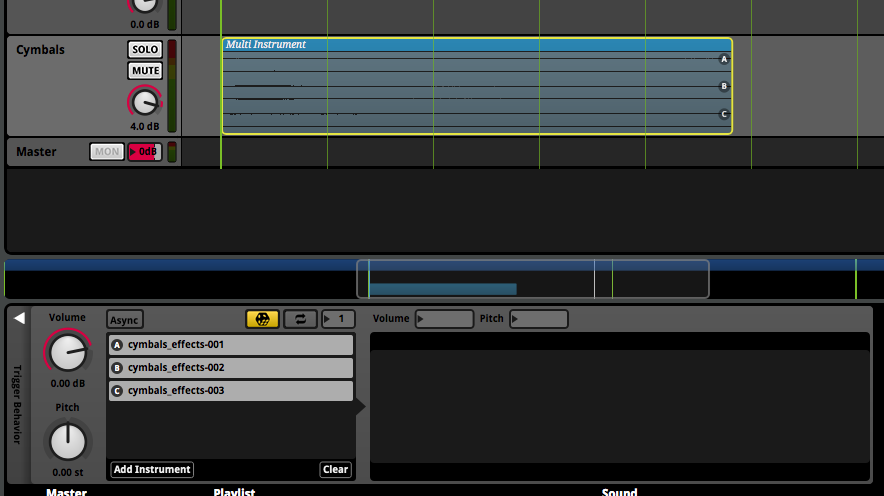
Figure 5.2
Multisound module works like this: during each playback, one of the files is selected and played. That’s it – every time the loop repeats, playback cursor goes over the module and plays it, and then one of the sounds is played. This way we can add random elements to our music. It’s normal for game music to play in loops. To avoid it becoming boring, we can use multisound modules to add random elements, or even create entire separate phrases, harmonies and other elements to play in random order.

Figure 5.3
I have placed the multisound module in the first loop. Of course, the track is still quite simple, but adding a couple of cymbals is a great way to show you how this technique works.
But that’s not all. Select the multisound module and click the white arrow in the dock, the one in upper left corner – by default some of the panels should be hidden and the arrow allows us to display them.
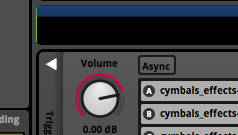
Figure 5.4
You will see the Conditions and Quantization panels that you’re already familiar with. Because you can also play specific modules when the game, through parameters, set specific conditions. But right now we’re interested in a different thing: Probability. This is what it sounds like – click the dice icon – once activated, it will turn yellow.
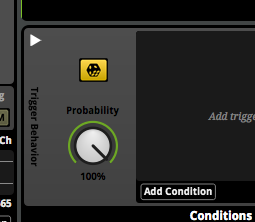
Figure 5.5
Now you can change its Probability value to 50% or similar, and when you do so, there will be 50% of chances that the module will play. Play the loop and you will notice that sometimes, the module plays, and sometimes it remain silent. This is yet another way to randomize our music.
A similar dice of probability can be found in the list of the sounds within the module. Activating it will literally randomize the order in which the sounds are played. Without it, the sounds are played in an ordered fashion: 1, 2, 3, 1, 2, 3, … and so on.
Snapshots in FMOD
Snapshots are a saved settings of the sound – we can have multiple snapshots and switch between them. Snapshots are often used to change the volume of our music once we switch to the game’s menu, or to increase the interactivity of our sounds. In this section we will use a snapshot to muffle the music if the health of our player character drops below 50%. Then we will add some minor changes in our scripts, but first let’s create a snapshot itself.
In FMOD main menu, choose Window | Mixer. This will display the mixer window. In the Routing tab, right-click in this panel and choose New Group. Call this new group Music. Next, drag the HorizontalMusic event into this group, thus assigning it to the group.
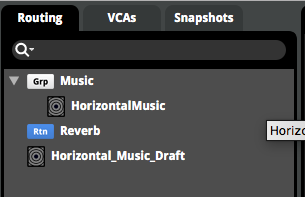
Figure 5.6
This way you’ve created a new group of sounds in the mixer – you will be able to change the volume of all the events in this group, and add group-level effects such as EQ or compressor. Once you have many files in your projects, grouping them will be very useful.
Switch to the Snapshots tab and create a new snapshot, by right-clicking in the left panel and selecting New Snapshot | New Overriding Snapshot. Call this snapshot LowHealth.

Figure 5.7
At the middle of the screen you see mixer groups, including the Music group you created earlier. Select it by clicking on it in the main mixer’s workspace. At the bottom of the screen, in the dock, click the plus + icon and add a new effect, Multiband EQ, by selecting Add Effect | FMOD Multiband EQ.
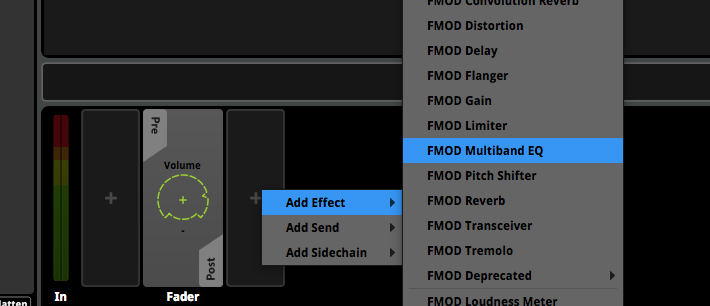
Figure 5.8
By default, this plugin should cut the high frequencies, muffling the sound – but we want this effect to occur only after triggering the snapshot, and not by default the entire time. Reset the A band now, so that the plugin does not affect our music for now. You can do this by dragging the A band, or by selecting Off from its menu.
You can’t add plugins to the snapshot itself – you can add them only to groups or modules. Snapshots allow you to simply save the settings of what’s already there.
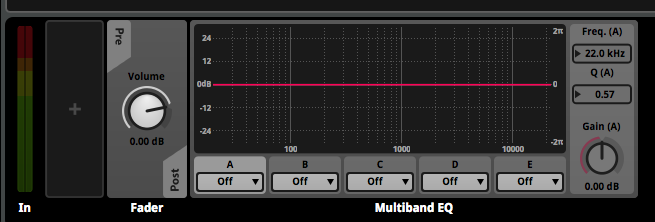
Figure 5.9
Select the LowHealth snapshot now. Once the snapshot is selected, you can edit plugins and groups, and these modified settings will be saved in this snapshot. When you deselect the snapshot, all these settings will return to normal. At the top of the mixer you see the basic playback controls. Clicking them, when the snapshot is selected, actually turns the snapshot on. So if you want to test the snapshot, first in the events editor play our music, then go back to the mixer, select the snapshot and hit play button in the mixer. To stop testing the snapshot, click the stop button.
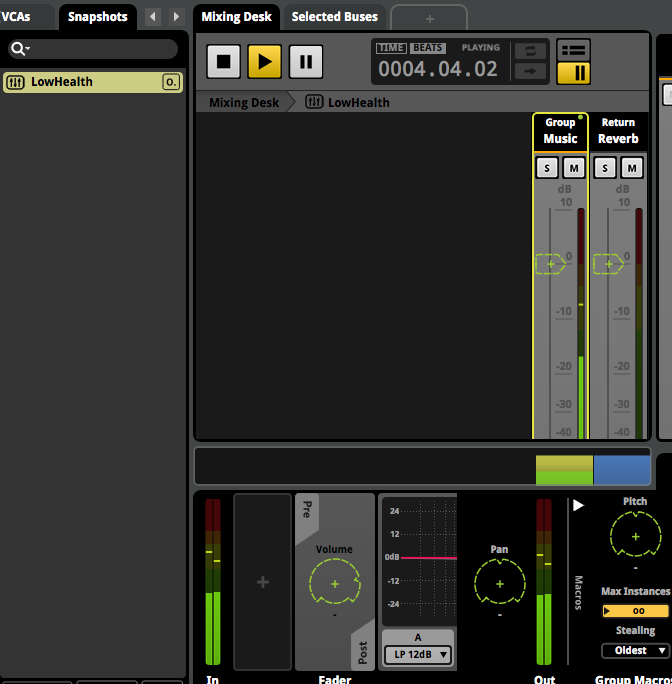
Figure 5.10 – Clicking “Play” when music is playing, allows you to start and test the snapshot.
Make sure you’ve selected the snapshot and our Music group, then change the A band in the EQ to cut everything above 1000 hz.

Figure 5.11 – LowPass on the A band.
Build and save the project.
Our snapshot is ready. Now we need to control it through scripts in Unity. To do so, we will create another trigger zone in our scene. After walking into it, the health of the player will drop below 50% which will trigger the snapshot. Once the player regains his health after walking into a healing ball (because this is all my graphic skills allow me to create), the snapshot will be turned off and the music will return to normal.
Go back to Unity. Using the knowledge you already have, create a new trigger zone in the scene.
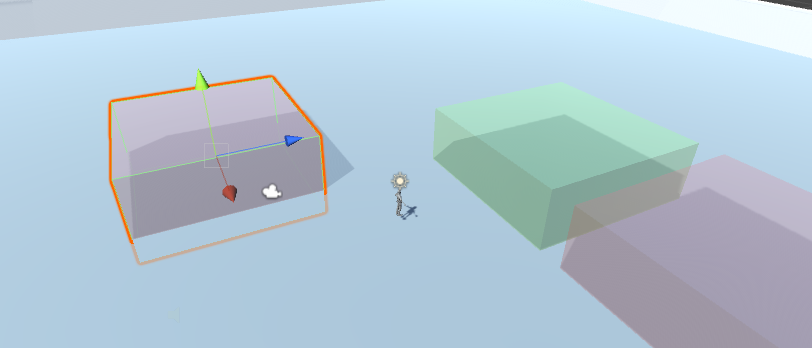
Figure 5.12
If you’re using the files I’ve prepared for this book, in the Project panel you should see two scripts:
- ZoneExample
- Health
Attach the ZoneExample script to the trigger zone you’ve created. Next, attach the Health script to the player – in my case, this is Ethan and its ThirdPersonController object. Next, select the trigger game object (the one with ZoneExample script), and in the Inspector assign the ThirdPersonController to the Player variable.
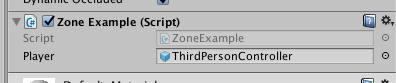
Figure 5.13
These two simple scripts offer a simple way to take player’s health away from, until the health drops below 50%. This simple solution will help us learn how to work with snapshots.
Switch to the Console view now. Play the game and walk into the new trigger zone. The console should automatically display the default health value and then show how the health drops, until it reaches 40 points.
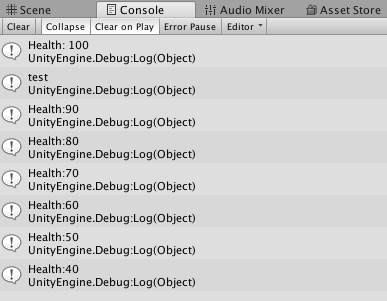
Figure 5.14
Now, open the Health.cs script. Add a new namespace at the top, right below the using UnityEngine;.
using FMODUnity;
This way the script will be able to use FMOD commands. At the beginning of the class, let’s declare a new variable:
FMOD.Studio.EventInstance snapshot;
Next, go to Start() method and initiate this variable:
snapshot = FMODUnity.RuntimeManager.CreateInstance ("snapshot:/LowHealth");
As you can see, we have assigned a specific snapshot to our variable: snapshot:/LowHealth – it is the same snapshot that we have created in FMOD earlier. Now go to the LowerHealth() method. This method is called by a coroutine, when the player enters a trigger zone. This simple method slowly lowers health points. Right below health = newhealth, add a new piece of conditional code:
if ( health <= 50 ) {

snapshot.start();

}
This will check if the health dropped below 50 points (or is equal to 50 points). If true, the method calls snapshot.start() – this is a built in method in FMOD that initiates a snapshot or event (it’s a code equivalent of pressing the play button). Go back to Unity and play the game. Enter the trigger zone that lowers the health and wait until your health drops below 50 points. When this happens, the snapshot will be initiated and music will be muffled.
Stop the game and find a new prefab in the Project panel, called Healing. Place it somewhere in the scene outside the health trigger zone. A script, called HealingTouch, is attached to this prefab. Select the prefab and assign the player character, ThirdPersonCharacter, to a Player input field in the script’s component.
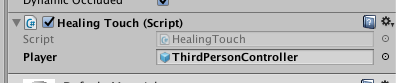
Figure 5.15
Now when you play the game, you can wait for health to drop below 50 points, at which point the snapshot will be initiated. Then you can walk into a healing ball, and you will have 100 health points again. And if you wonder, then yes: because it’s a simple script, your health can drop to -20 and even below that, and the character won’t die. But right now, the healing ball heals the player, but doesn’t turn off the snapshot.
Let’s go back to the Health.cs script. Inside, find a method called Heal(), and right below health = 100; add:
snapshot.stop(0);
In this case, .stop() method takes a single argument, 0. When you play the game now to test it, after healing by using a healing ball, the snapshot will be turned off, and the music will be clear again.
Playing Sounds Using Code
Notice the following piece of code from earlier:
FMOD.Studio.EventInstance snapshot;
Here we declare a variable of a FMOD.Studio.EventInstance type. This variable is then initiated inside the Start() method, and we assign a snapshot to this variable using code. In the same way you can assign events to variables in scripts, omitting FMOD components in the Inspector all together.
Go back to FMOD and create a new 2D event. Call it Stinger. Change the name of the audio track to Stinger as well. Now go to Audio Bin, and drag a file into it, strings_stinger.ogg, which I’ve created for this book (in the basic music folder). Next, drag and drop this audio file on the Stinger track in the Stinger event. Don’t forget to add this event to a bank, for example to a Master Bank.
Now build and save the project. Go back to Unity. In the Hierarchy panel, find the object ThirdPersonController. Add a new C# script component to it, and call this script Stinger. Open the script and add a new namespace right at the beginning:
using FMODUnity;
At the beginning of the class, declare a new variable:
FMOD.Studio.EventInstance stingerEvent;
Next, in the Start() method, initiate this variable:
stingerEvent = FMODUnity.RuntimeManager.CreateInstance ("event:/Stinger");
This way you have assigned an event to our variable called stingerEvent. The “event:/” piece tells the engine that we’re going through the library of all the events, and “Stinger” piece is simply a name of our event.
We can play this event in a simple way:
void Update () {

if (Input.GetMouseButtonDown (0)) {

stingerEvent.start ();

}

}
This way the event will play whenever we press the left mouse button when the game is on. You can also stop a looping event by using another method:
stingerEvent.stop(0);
In this simple way, you can play events using only scripts, with no components attached to objects. You can also use both methods – add a Studio Listener component to an object, but without setting when it is played in the component itself, instead using scripts and .start() method.
***
Probably the most popular example of uses for snapshots is controlling volume of all the sounds and music in an RPG game when dialog options appear. Generally, whenever you want to use the same sounds but change their settings to use from time to time, you can use snapshots.
You now know how to use snapshots. Let’s learn how to work with vertical adaptivity of our music.
Don't forget to become a fan on Facebook and subscribe to new posts via RSS or via email.
More from my site
 Interactive Game Music for Beginners with FMOD – Part 7
- Interactive Game Music for Beginners with FMOD – Part 5
- Interactive Game Music for Beginners with FMOD – Part 3
- Interactive Game Music for Beginners with FMOD – Part 2
- Interactive Game Music for Beginners with FMOD – Part 1
- Interactive Game Music for Beginners with FMOD – Part 4


