Reaper DAW, made by Cockos, is a powerful, although not very modern in its design, digital audio workstation that is very affordable. For personal use, non-commercial work or business making less than 20 thousand dollars a year, you can grab a full license for 60 dollars. It is a DAW I have picked up because I started making music while still working on Linux – and Reaper was the only DAW working well on this operating system.
Let’s take a quick look at Reaper and learn how to use it from scratch.
How to Download and Install Reaper
You don’t have to buy Reaper in order to download it. Reaper offers a free trail period that lasts for 60 days. First, go to https://www.reaper.fm.
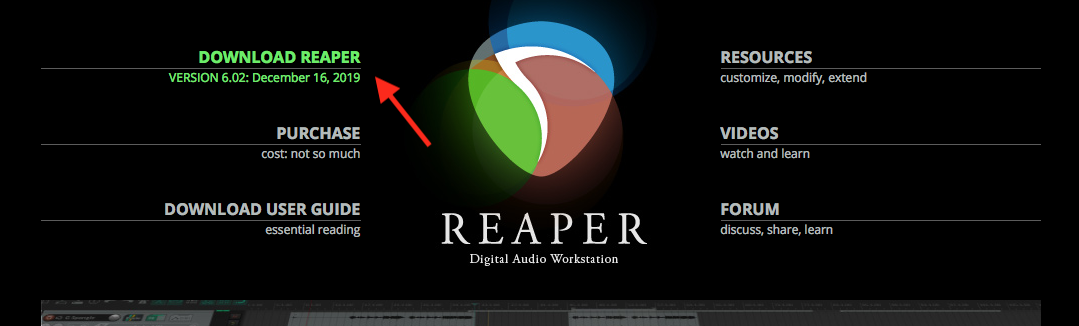
Download Reaper DAW
Click “Download Reaper”.
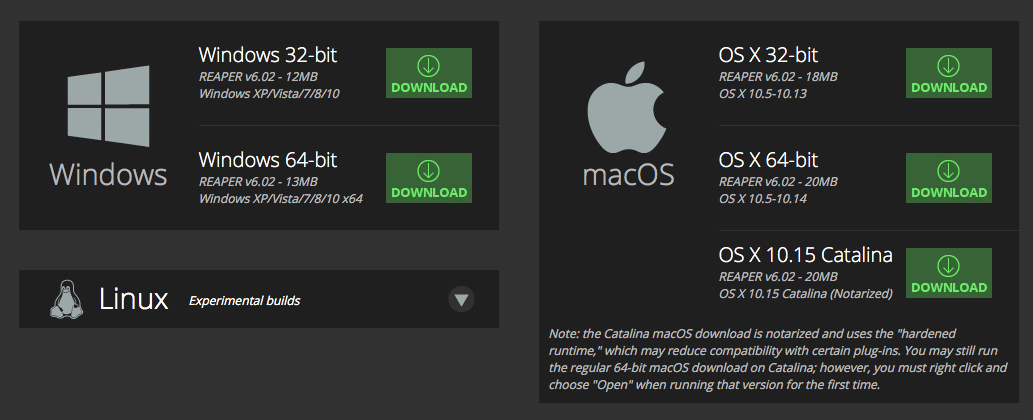
Select your version of Reaper.
Once the page reloads, select the version of your OS – once you click the green download button, you will download an install wizard. Install the software normally, like you install all your software. Once you’re done, just open the program. If you’re using a free trial version (which means you haven’t registered the product), a window will appear every time you open the DAW, that will tell you you’re using a trial version. You will be asked to type a license key. You can safely close this window if you don’t want to register the software yet.
Everything will work in trial version – there are no limits whatsoever. Some DAWs limit the number of tracks or plugins in free version, but not Reaper – literally everything works in unlimited way.
How to update Reaper
Basically, if you already have Reaper installed, you need to go to reaper.fm and download a new version in the same way as you did above. Then install the new version in the same folder on your computer, and it should update with no problems.
How to Buy Reaper
Go to https://www.reaper.fm and in the top menu select “Purchase”.
You will have two options:
- $60 : discounted license.
- $225 : commercial license.
On the “Purchase” page you can read about the licenses, and chose the one that fits in your case. Then, click the green “Buy Now” button and you will be guided through safe payment provided by FastSpring.
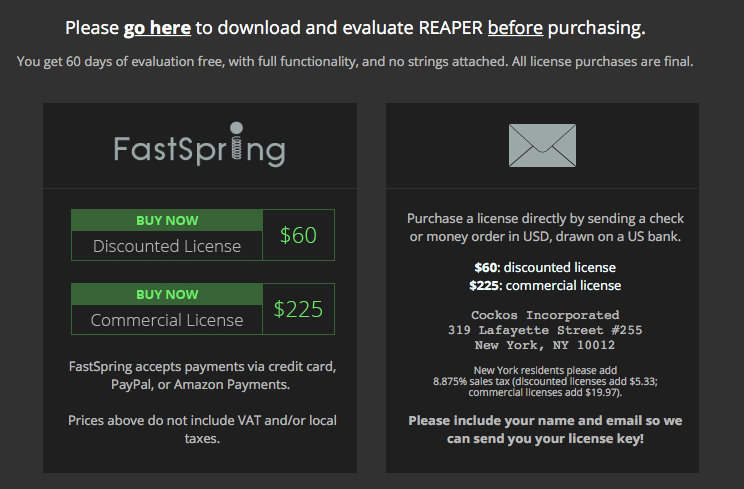
Buy Reaper DAW
After payment, you will receive a license key on your e-mail address. Store it well – make a couple of safety copies, too. Next, open Reaper and once the “trial” window appears, you will be able to type the license key where the window tells you to. From now on, the window won’t appear and your software will be registered. Beyond that, nothing changes – the functionality is the same, but you just bought an awesome DAW :).
***

Reaper DAW Workspace
Now that we have our Reaper DAW up and running, we can learn, step by step, how to do all the stuff a typical DAW does. The workspace of Reaper is very simple but to learn everything, it’s best to make these small steps.
How to Add a Track to Reaper
To add a track to Reaper, right-click on the dark column/area on the left side of the workspace. From the menu, select “Insert new track”.

Add a Track in Reaper
And a new track will be added.
New track in Reaper.
Alternatively, you can add a track by double-clicking on the darker, left column. A new track will also be created automatically if you drag and drop either a MIDI file or audio file from a folder directly into your workspace.
How to Select a Track
To select a track, simply left-click the track panel – the selected track will be highlighted. You can also select multiple tracks. You can do so, by left-clicking the track panel of any track you want, while holding down the CTRL key on the keyboard at the same time. On MacOS, you need to hold the Command key, not CTRL. You can then do various things with multiple tracks selected:
- Move multiple tracks at the same time.
- Group multiple tracks.
- Delete multiple tracks.
I will explain moving and deleting tracks later.
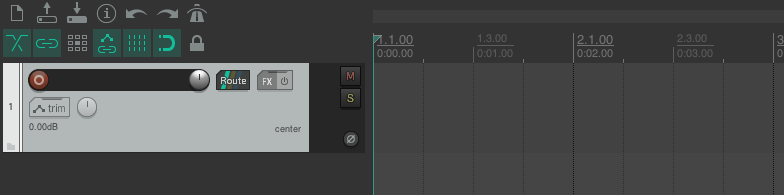
The Track Panel
Track control panel contains a couple of features that you will use all the time. First of all, there’s a number displayed on the left side, which tells you the number of the track. This value is not absolute – if you move the track up or down, the number will change.
Track Control Panel in Reaper.
Now, let’s take a quick look at other elements.
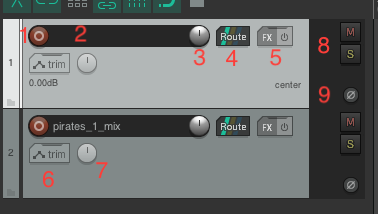
Track Panel in Reaper – Features.
(1) is the arming button – you click it, and it glows red, which means you have armed the track for recording. This means that whatever you record will be recorded on this armed track. This works both for recording audio from a source (like a home studio microphone), or for recording MIDI input from a MIDI controller (such as MIDI piano keyboard).
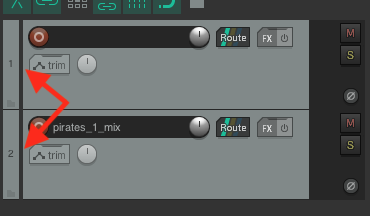
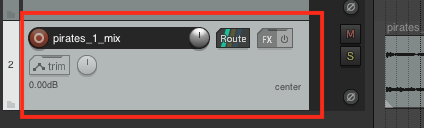
(2) is the track’s name – you can double-click it and type whatever name you desire. For example, the track 2 is named “pirates_1_mix” in the example above.
(3) is the volume knob for this track.
(4) is the route button – it opens a routing window where you can route the track.
(5) is the FX button – it opens an FX window where you can add plugins, samplers and effects to this track.
(6) is an automation button – it opens an automation window where you can select the parameter you wish to automate for this track.
(7) is the panning knob – it allows you to pan the sound of the track left or right.
(8) marks two buttons: M and S. The M stands for mute, and this button allows you to mute the sound. S stands for solo, and this button allows you to listen only to this track. You can mute multiple tracks at the same time, and you can also solo multiple tracks at the same time.
(9) is the phasing button, and you can invert the phase of the track with it.
I will explain how to work with FX window, Routing window and Trim window later in this course.
In Reaper 6.0 and higher, Cockos introduced something new – now in order to see additional buttons you need to click the “Arm” track button. Once you do so, new things will appear.
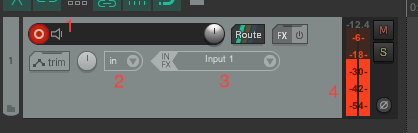
Arming the track and monitoring.
On the image above:
(1) the speaker icon can be clicked three times and it will cycle between live monitoring of the sound being received. You can either mute it completely, or set it either to ON or AUTO.
(2) recording settings – what do you want to record and how.
(3) input settings – what is the source of signal you wish to record.
(4) the meter showing you how loud the sound is – it glows red when recording, but green when listening to audio and this will show with or without arming the track.
How to Drag a Media Item into Workspace
To drag a media item into your workspace, just open the folder, select the file, click and hold it, and then drag it into workspace.

Drag a media item directly into workspace.
Reaper will work for a while (how long depends on the size of the media item you’re uploading), and then it will create a new track with a media item in it.
If you drag and drop a MIDI file, two things may happen. If you drop a single-track MIDI item, Reaper will simply create a new track with this item. If you drop a multi-track MIDI item, Reaper will display a window and ask what you want to do.
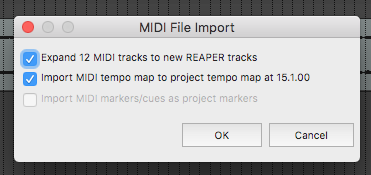
Adding a multi-track MIDI item in Reaper.
You can drop a MIDI file as separate tracks – to do so, keep the “Expand n MIDI tracks to new REAPER tracks” checked. Reaper will create all the separate tracks thanks to this. If you want to create only a single track, you can deselect this option, and Reaper will combine all multi-tracks into one.
You can also import the recorded tempo of the project, by keeping the “Import MIDI tempo map to project tempo map at n” checked.
How to Move a Track
All tracks can be moved up or down the workspace. To move a track, simply left-click and hold the track panel, using the mouse – then move the track up or down. The track itself will not move around, but you will see a highlighted bar between other tracks, where the track can be dropped.
Track Panel
When you’re ready, release the mouse button and the track will drop at new location.
How to Group a Track
You can group tracks together. To group a track, left-click and hold the track panel, and then move the track under the parent track. The highlighted bar will appear as you move the track – while holding down the track panel, move your cursor to the upper half of the parent track, and you will notice the highlighted bar will move a little to the right – release the mouse button and the track will now be grouped.
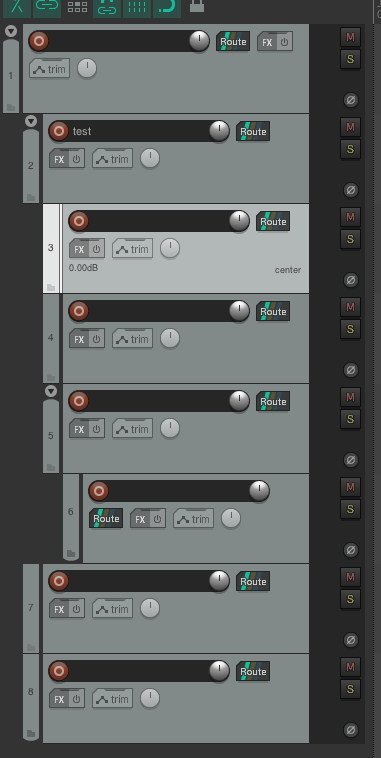
How to Group Tracks in Reaper.
You can group tracks up to six levels. Grouping tracks also changes the signal chain. A track on level 1 will send its signal directly to Master channel, unless told otherwise. But a track on level 2 will send its signal to its parent track only, unless told otherwise.

Change the size of child tracks in Reaper.
Above the track’s number, you can see a small arrow – it either points down, or right, or down-right (somewhere between the two). You can click it three times – each time you do so, you will change the size of child tracks for this parent track (this arrow appears only when the parent track has child tracks). Clicking cycles between three settings – full size panels, medium panels and hidden panels.
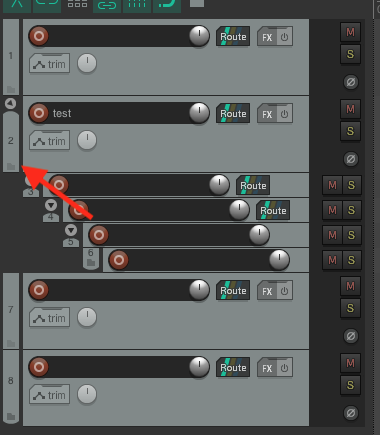
Group tracks in Reaper by clicking a button.
You can also group tracks in Reaper by hovering the mouse cursor above the little folder icon – marked with an arrow above. The icon will change either to a + sign, or an x sign. Clicking the button will either group or ungroup a track below the parent track. If the first child track has its own child tracks, all of them will be grouped or ungrouped in relevance to the parent track.
Don't forget to become a fan on Facebook and subscribe to new posts via RSS or via email.