We continue the “Learn Reaper DAW” series, in which I teach you, step by step, the basics of working with Cockos Reaper digital audio workstation. In this part, we will work more on individual tracks, and various MIDI and Audio items.
How to Copy a Track
To copy a track in Reaper, right-click the track’s control panel, and from the menu, select “Duplicate tracks”. The track will be copied entirely – it’s media items (MIDI items, audio items), and FX plugins along with their settings will be copied as well.

Copy a track in Reaper.
The reason the option says “tracks”, plural, is because you can select multiple tracks, right-click on one of them and select this option, and all the selected tracks will be copied.
How to Delete a Track
To delete a track in Reaper, right-click on the track panel (marked with an arrow), and from the menu, select “Remove track”. The track will be removed.
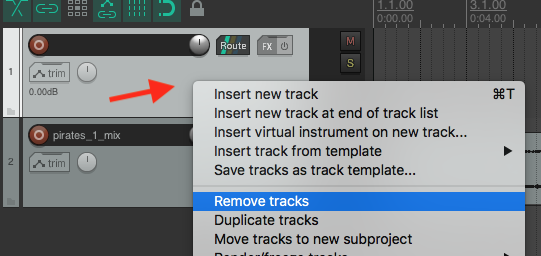
Remove Track in Reaper
You can also select the track by left-clicking the track panel, and press “Delete” on the keyboard. But then, Reaper will ask you to confirm you want to delete the track.
How to Change the Size of Tracks
To change the vertical size of tracks, hover the mouse cursor above the bottom edge of the track – the cursor will change, and then left-click and hold the edge, and drag it up or down. This is a simple way to change the size of a single track.
You can also change the size of all tracks. To do so, press and hold either the CTRL key (on Windows) or the COMMAND key (on Mac), and use the mouse wheel to scroll up or down, and this will change the size of the tracks.
How to Change the Size of Workspace
To change the horizontal size of the workspace, hover the mouse cursor above the workspace, and without pressing and holding any key, simply use the mouse wheel to scroll up or down, and the size of the workspace will change.
You can also resize the workspace and the tracks manually, by clicking the + and – icons in the left bottom corner of the screen. The bottom icons will change the size of the workspace, and the right icons will change the size of the tracks.
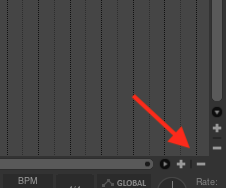
Resize the Workspace and Tracks.
How to Scroll the Workspace
To scroll the workspace up or down, hover the mouse cursor above the tracks panel on the left, and use the mouse wheel to scroll up or down.
To scroll the workspace left or right, hold down the ALT key on the keyboard (all OS), and use the mouse wheel to scroll up or down.
Scroll the workspace in Reaper.
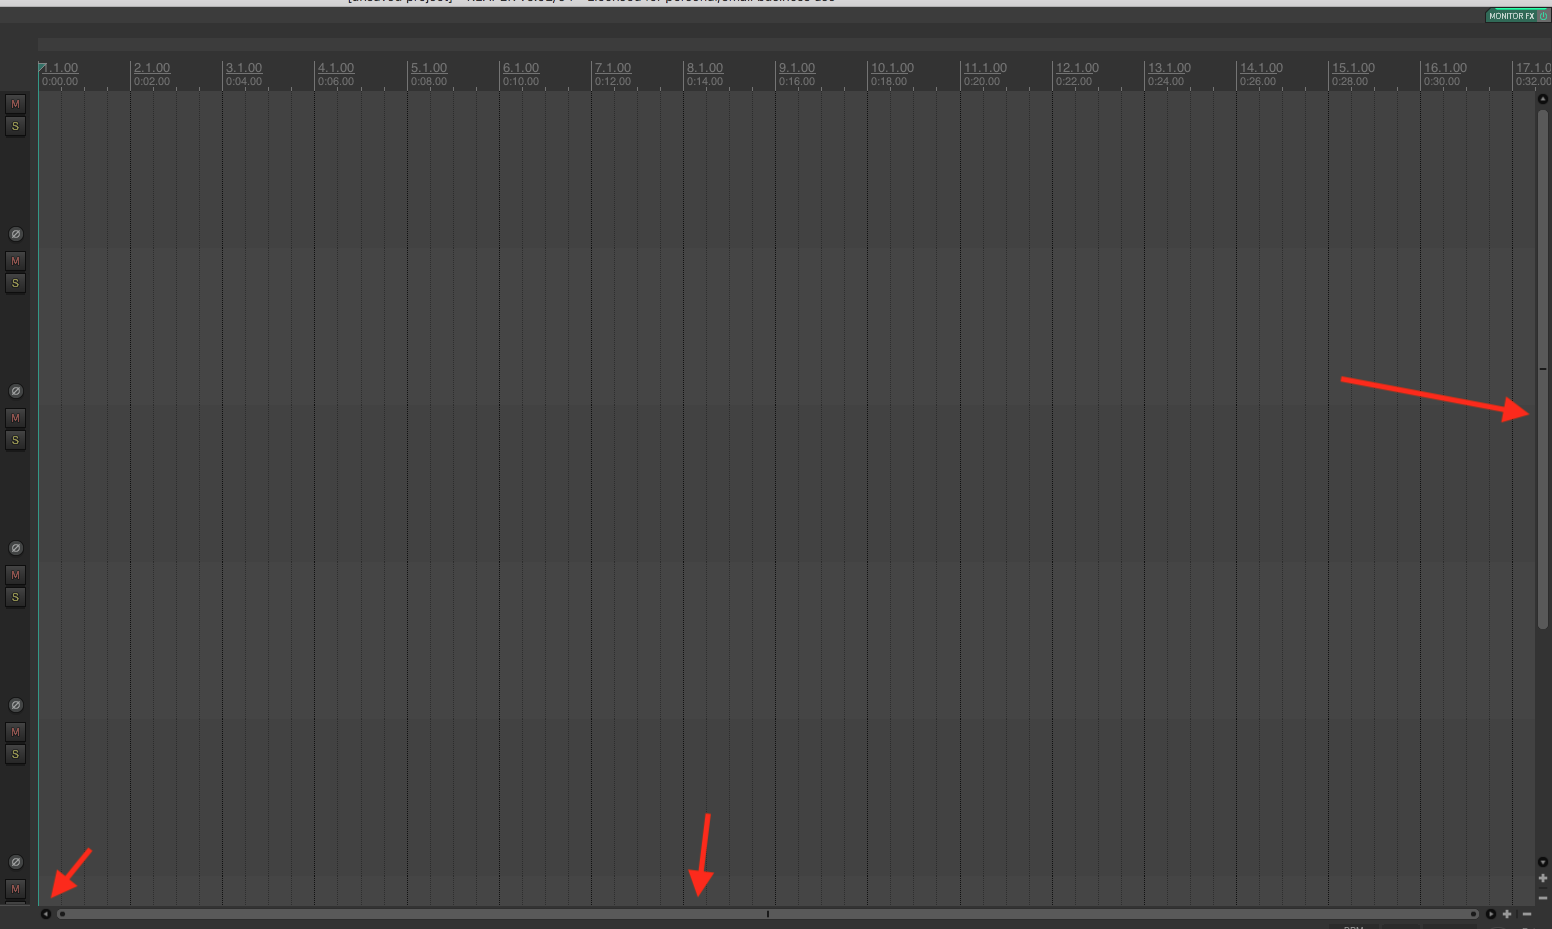
You can also use the sliders on the bottom and right side of the workspace to move around manually. You can also use little arrow icons on left and right side of the bottom slider, and up and down side of the right slider, to do the same.
How to Make a Selection
To make a selection in Reaper, left-click and hold the mouse cursor above the timeline (at the top of the workspace) – then drag the mouse left or right, and when you have selected what you intended, release the left mouse button. This will make a selection

Make selection in Reaper – the numbers represents the timeline.
You can do various things with a selection, for example you can now create a MIDI item, or create a region. We’ll talk about both in this series of tutorials.
How to Create MIDI Item
In order to actually compose some music and add some notes to your track, you need to define a MIDI item – a small box, which you can open with a built-in MIDI editor.
To create a MIDI item, first, select a track, for which you want to add a MIDI item. It there are not tracks at all yet, when you create your MIDI item, the first track will automatically be created.
When a track is selected, make a timeline selection like explained earlier.
Then, from the main menu, select Insert -> New MIDI item.

Add MIDI item in Reaper.
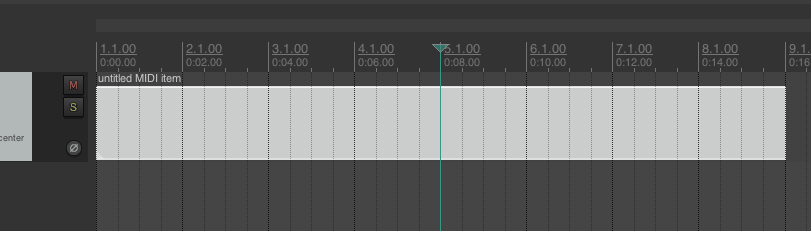
A MIDI item will be added.
How to Resize a MIDI item
Now, things will get a little tricky. How to resize the MIDI item if you want to make it bigger? Basically, you need to hover the mouse cursor over left or right edge, left-click and hold the mouse, and then drag the item left or right.
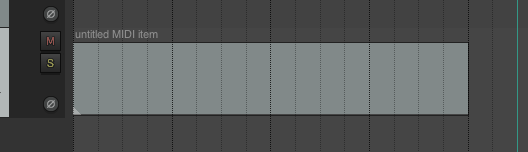
An empty MIDI item in Reaper.
But by default, this will result in a fancy arrow icons.

Loop points in Reaper.
These are called “loop points”, and they mark a loop – basically, you simply lopped the original MIDI item – whatever was in this original file, is now repeated. This may be useful for creating drum loops or loops of exactly the same elements, but it’s not what we’re after. We simply want to resize the MIDI item to make it bigger. There are two ways to do so.
Right-click on the MIDI item, and from the menu, go to Item settings, and then uncheck the “Loop item source“.

Unloop the MIDI item.
Now when you left-click and hold and drag one of the edges of the MIDI item, it will be resized without creating a loop.
You can also resize the MIDI item in MIDI editor, by left-clicking, holding and dragging the edge of the editable space.
Resize MIDI item in MIDI editor.
How to Select a MIDI Item(s)
To select a MIDI item, simply left-click it with the mouse. To select multiple MIDI items, h0ld down the CTRL key (on Windows) or COMMAND key (on Mac), and left-click all the MIDI items you want to select.
How to Merge Two MIDI Items Together
Another way to resize a MIDI item is by merging two or more MIDI items together. First, select the MIDI items you want to merge – they have to be on the same track. Then, right-click one of the selected items, and from the menu, choose “Glue items”.
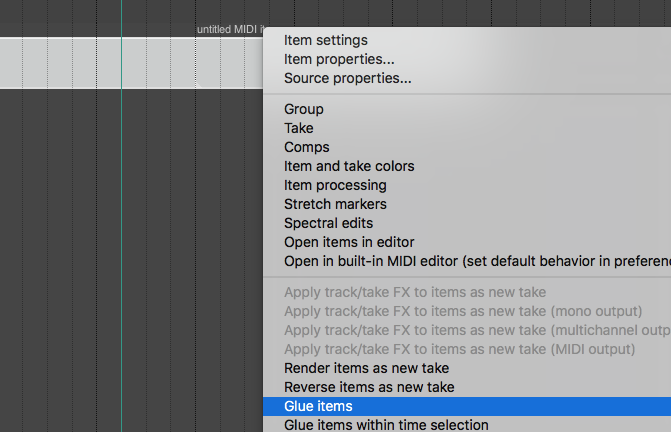
Glue MIDI items in Reaper.
This will merge two items together.
If you merge two MIDI items, but there is empty space between them, this space will also be included in a new, merged MIDI item.
How to Splice a MIDI Item
Before we learn how to splice a MIDI item, please notice a vertical line with an arrow on top of it, that is teal in color. This is the control cursor – it tells you at which point of the track you clicked, at which point you will start the playback, or recording, or, in this case, in which place you will actually splice the track.
Click around the time line with the left mouse button and notice how the control cursor changes place.
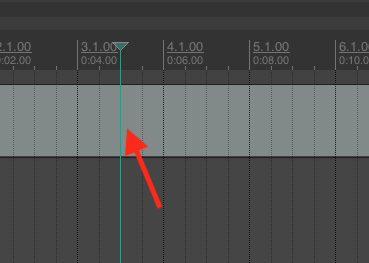
Control cursor in Reaper.
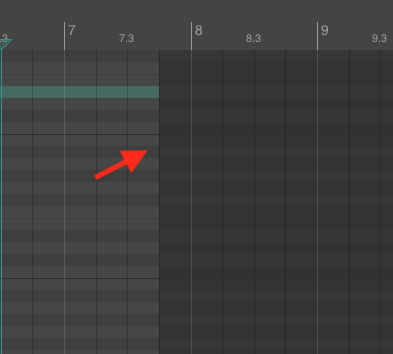
To splice a MIDI item, left-click on the MIDI item that you wish to splice. In the image below, I clicked in the very middle of the MIDI item.
Splice MIDI item.
When the control cursor is set where you want to splice the track, and the item is selected (because you left-clicked it), simply press S on the keyboard, and the item will be spliced. If you select multiple MIDI items at the same time, and press S, you will splice all the selected items at the same time at the control cursor’s location.
Note: this splicing technique applies to audio items as well.
How to Delete a MIDI Item
To remove the MIDI item, right-click it with the mouse, and from the menu, select “Remove items”.
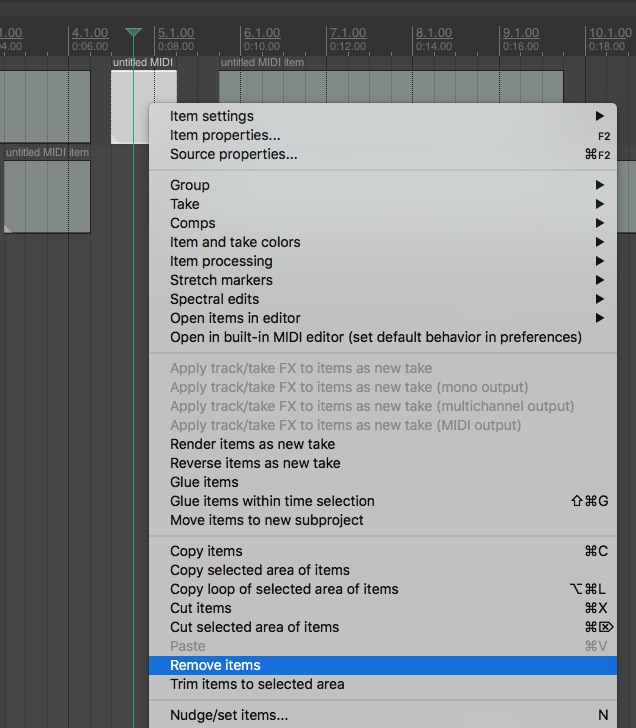
Remove MIDI item.
If you select multiple items at the same time, and right-click on one of them, and then select “Remove items”, this will remove all the selected items.
You can also select one or multiple items by left-clicking on them, and then pressing “Delete” on the keyboard. This, too, will delete the item.
How to Move MIDI and Audio Items
To move a single item (either MIDI or audio), left-click and hold it, then move it with the mouse left or right, to move it time-wise. You can also move a selected item from track to track, by left-clicking, holding and moving the item up or down.
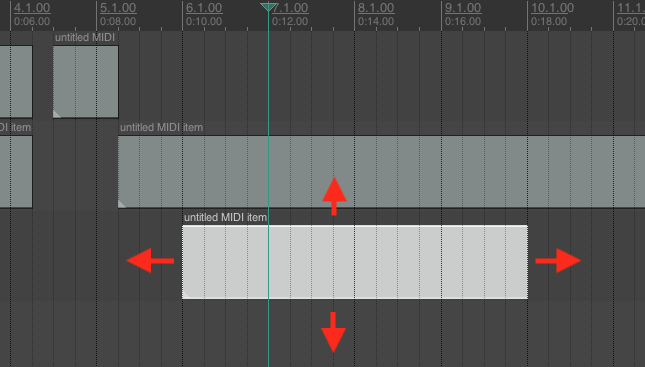
Move an item.
If you happen to move the item below the very last track, a complete new track will be created for this item.
***
In the next part of this series, we will learn how to work with the MIDI editor.
Don't forget to become a fan on Facebook and subscribe to new posts via RSS or via email.