
In this part of the series, we will finally create an FMOD project and Unity project. Then we will integrate both projects with each other, and create a very simple game scene with a piece of music that loops automatically. Let’s get started!
Remember, the first part of this series contains links for a free download of source files for this entire course, click: Interactive Game Music for Beginners with FMOD – Part 1.
3. Integrating FMOD and Unity
In this chapter we will integrate FMOD and Unity projects. We’ll create a simple scene, and play some background music that will play automatically and loop indefinitely. This will we will learn the basics of actually working with FMOD.
First, create a 3D project in Unity like you usually do (remember, I assume you already know how to do this). Save the project somewhere on your hard drive. Next, load the fmod_book_V3.unitypackage that I’ve added to this book (downloaded separately, and the link was posted earlier in this course, in part 1). The package includes a very simple scene. Load the scene now from the Project panel. You will see an empty flat surface with four walls.
If you do have your own scene to work with, you won’t have to use my scene. We’ll be working with FMOD mainly and some basic scripts to create simple triggers in our scene. The only requirement of your scene is that it should have a player character able to move and enter various trigger zones.
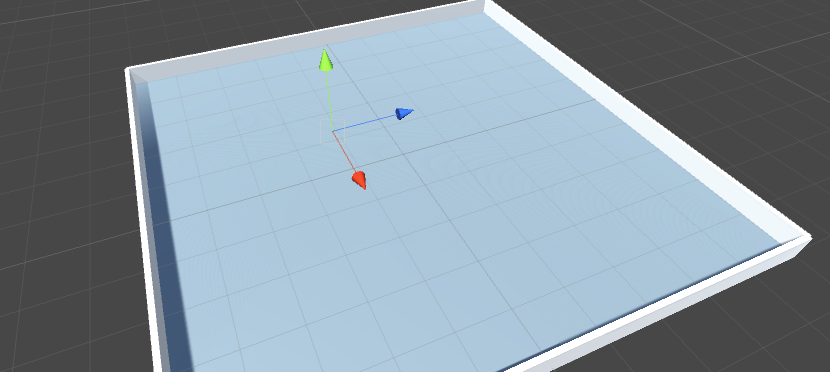
Figure 3.1
Now, if you’re using my scene, load the standard assets: Characters and Cameras.
Update 29th of July, 2020: Please note that since I originally wrote this guide, Unity Editor no longer has an option to download standard assets directly from the menu. Instead, go to Asset Store tab, then type Standard Assets into search and select the Standard Assets package (originally there was a menu in Unity Editor, in which you could automatically download standard assets. In newer versions of Unity, you have to use the store).
Standard Assets for this project were tested up to version Unity 2019 and they work fine.
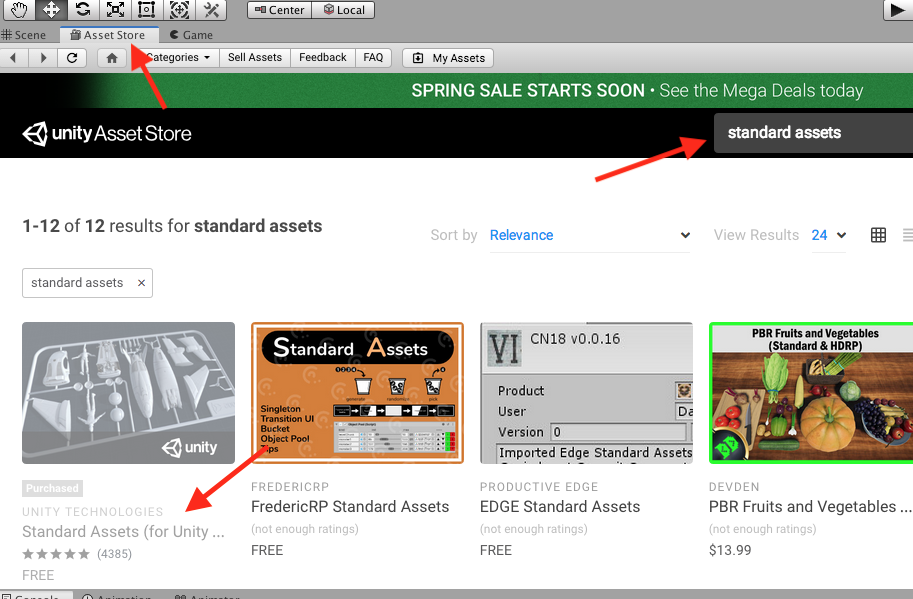
Go to Unity Store within Unity Editor.

Figure 3.2
Once there, click “Download”, and then “Import”. A window will appear. Please import all.
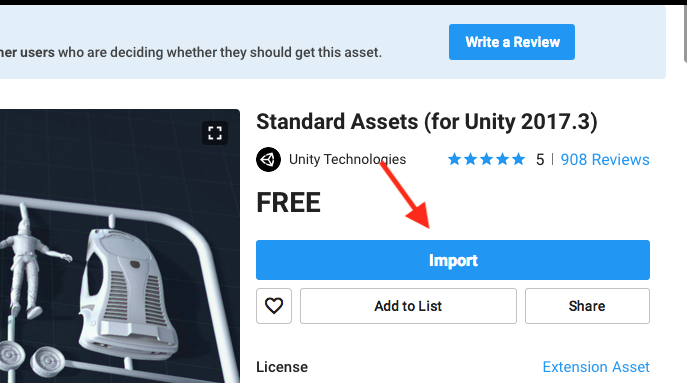
Download Standard Assets.
Then, go to Standard Assets -> Characters -> ThirdPersonCharacter -> Prefabs. Next, drag and drop a ThirdPersonController prefab onto the scene.
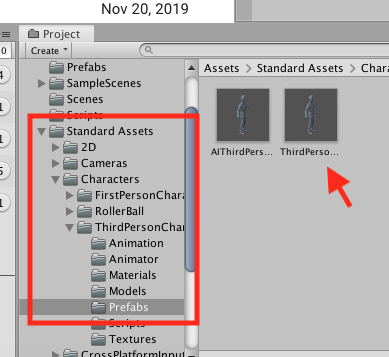
Find ThirdPersonController and drop it into the scene.
Next, from Standard Assets -> Cameras -> Prefabs, drag and drop the MultipurposeCameraRig prefab, as well.
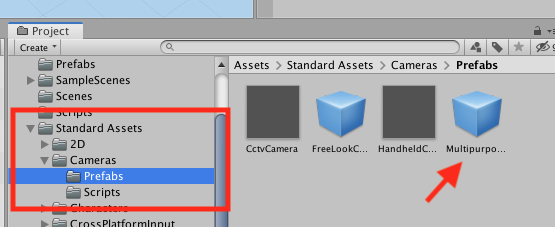
Drop the camera rig.
These two are standard assets offered by Unity and they should automatically create a player character, Ethan, on the scene, with a camera rig attached to the player, following him. Sometimes, the MultipurposeCameraRig won’t follow the player by default, so make sure that it does: select the camera rig object, and make sure the Target field has a player character assigned to it, like on the figure 3.4. If the field is empty, simply drag the player object into this field.

Figure 3.4
After launching the game, you will be able to use the keyboard to move around the scene. After creating a player character, we can move on. For now, you can leave Unity.
Creating FMOD project
Run FMOD now, either from the Start menu, or from the Launchpad. Click New Project.
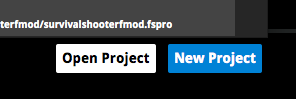
Figure 3.5
At first, nothing changes – the project window simply disappear. Save the project now, using the main menu, File | Save as…. Type the name of the project, for example fmodcourse. You can save the project anywhere on your hard drive, it doesn’t matter.

Figure 3.6
FMOD will save the project as a folder, in which it will create a file with the same name as the folder with an .fspro extension. Next, in FMOD use the main menu and go to File | Build. This way, you will build the project. This will create additional folders in the project’s parent folder. Each time you’re done making changes to the project, you need to build it again, otherwise the changes won’t be available in Unity.
If you can’t see an event or some change in Unity after working with FMOD, make sure you’ve added the event to a bank, and that you’ve built a project.
Integrating FMOD with Unity
The FMOD project is now done. Go back to the FMOD website, where you’ve downloaded the software. This time go to the Integrations tab: https://www.fmod.com/download#integrations. Here you will find integration packages for different game engines, like Unity or Unreal Engine. Find the Unity package and click Download. Save the file on your hard drive.
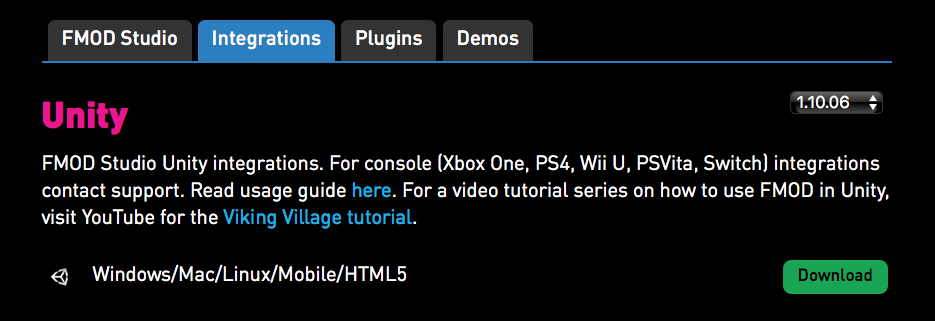
Figure 3.7
You’ve downloaded a standard package, .unitypackage. Go back to Unity now and import this package.
***
Useful Tip
Note – if you’re making a game for a console, such as Xbox or Playstation, you need to contact FMOD team regarding the integration, because the standard package offers no integration for consoles, but only for Windows, Mac, Linux, mobile and HTML5.
***
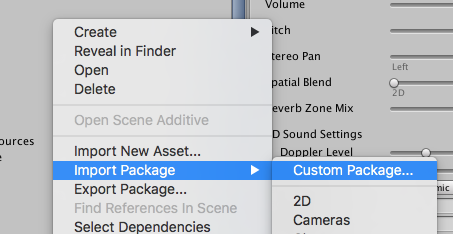
Figure 3.8
Import all files from the package into your project.

Figure 3.9
***
Useful Tip
FMOD is constantly being developed, so the version of the integration package might be different from the one you see on my screenshots.
***
After successful import, in the main menu of Unity you’ll see a new option: FMOD, like on figure 3.10.
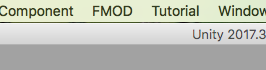
Figure 3.10
Click FMOD | Edit Settings.
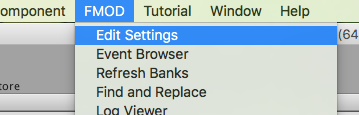
Figure 3.11
In the inspector panel you’ll settings for FMOD project. At first there won’t be too much stuff there, because you haven’t given the path to the project in Studio Project Path.
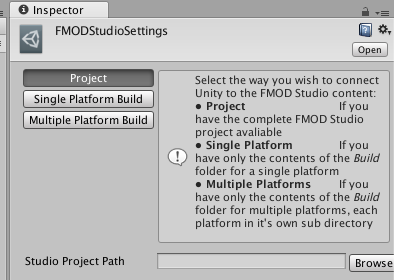
Figure 3.12
Click Browse and search for the FMOD project file you’ve saved earlier. In my case it was fmodkurs.fspro. Choose this file and confirm your selection. The inspector will display more stuff now, but don’t worry about it now. It will also display a warning message if the project has not being built. In this second sace, go back to FMOD and build it.
We’re done – this way you’ve have learned how to create and build FMOD project. You’ve learned how to integrate FMOD with Unity. From now on, all sounds you’ll be working with in FMOD will be available in Unity (after you add them to banks). Now it’s time to learn how to add and work with sounds in FMOD, and how to play them in the game. To learn this, we will add a basic background music to our project.
First sounds
Go back to FMOD – we have to create an event now and add some sounds to it, to play it in our game.
First, open the Audio Bin window, Window | Audio Bin. Next, drag and drop music files to this window. If you do not have your own pieces, you’ll find an example files in “Basic Music” folder from the package for this book.
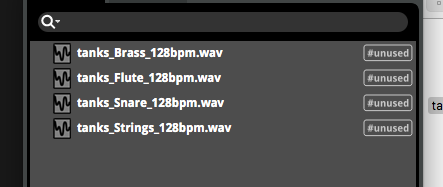
Figure 3.13
Now you can close Audio Bin window. In the editor make sure that you’ve selected Events tab in the left panel. Next, right-click in that panel and from the menu choose New Event | New 2D Event. Name this event Music or similar.
***
Useful Tip
Why do I have BPM value in the name of my files? FMOD allows you to define a different tempo and meter for each file. Typing these values in the name of the files is a good practice. If you’re the one programming music in the game, this way you will never forget the BPM of the pieces. And if it’s someone else doing the programming, having these values in the files names will save time.
Always write down proper documentation for the sound and music files that you make for the game.
***
Let’s create a 2D event now, because we’re creating background music and we want it to be constant, not affected by the movement of the player. Of course, if you’d like to create a sound that is affected by three dimensional space, you’d create a 3D event.
In the left panel, left-click the event to select it. After doing so, you’ll see the track in the workspace in the middle of the editor. This track is called Audio 1 by default.
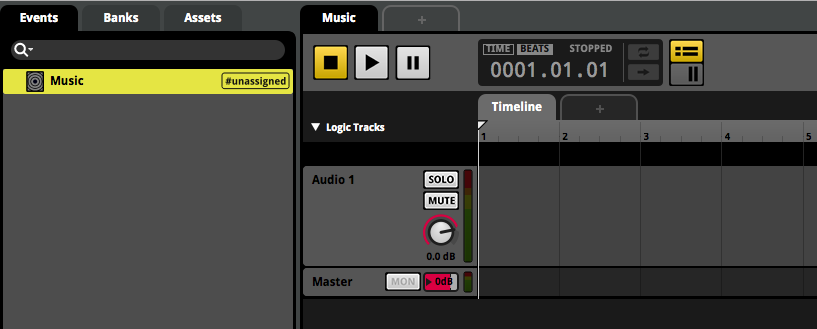
Figure 3.14
The #unassigned tag tells us that the event has not been assigned to a bank yet.
Right-click into the Audio 1 area, the on with the name of the track, volume knob and solo/mute buttons. From the menu choose Add Audio Track. Repeat this two more times, to have four audio tracks in total.

Figure 3.15
Change the names of the tracks to “Brass”, “Strings”, “Flute” and “Snare”. You can change the names of the tracks by double-clicking the “Audio 1”, “Audio 2” names and so on, and confirming new name by pressing Enter. Now, in the left panel choose “Assets” tab. This will display a list of files you’ve previously put into the Audio Bin.
Drag each file to separate audio tracks with related names. Drag Snare and Strings twice, to create two modules on these two tracks (copies). Next, drag a single occurrences of the Flute and Brass files. You can move the modules by clicking them and while holding the mouse button, moving them around left or right, or up and down.
Create something similar to figure 3.16.
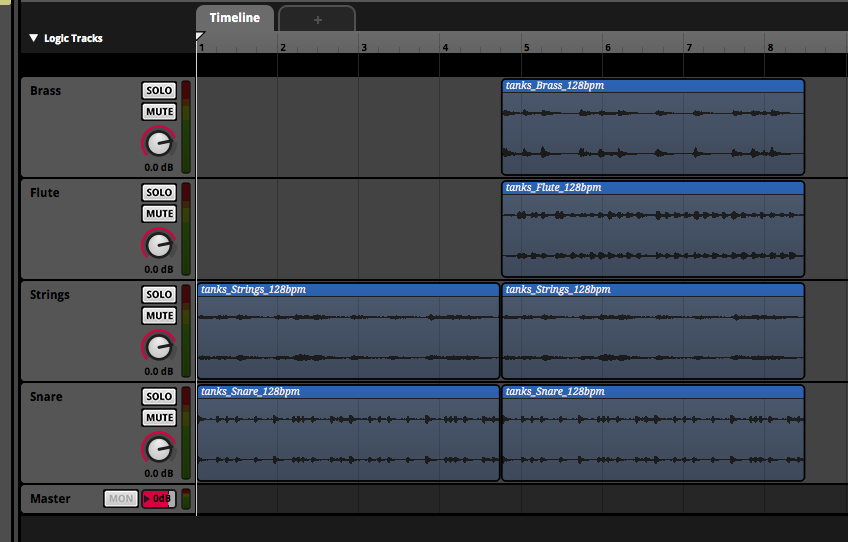
Figure 3.16
Of course, you can always select one of the modules, and use CTRL + C with CTRL + V to copy and past modules onto the tracks. The copy and paste options can also be found in the right-click menu for each module.
Figure 3.16 contains Strings and Snare modules on the left, and Strings, Snare, Brass and Flute modules on the right. This way we have added six modules to our event. Click the play button to listen how everything sounds. You will notice that after the first playback, the music stops – this is normal, because we haven’t told FMOD to do otherwise yet. We’ll do it now.
Notice on figure 3.16 that in the left upper corner of the workspace you see the words “Logic Tracks” with a small arrow pointed down. Clicking it shows and hides the logic tracks area. This area is the black region above the audio tracks, yet below the timeline. Make sure the black region is expanded, and right-click there. From the menu, choose Add Loop Region.
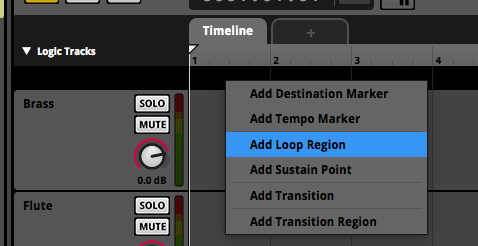
Figure 3.17
This will create the loop region, which you can drag left and right, by left-clicking its borders and dragging the region both ways to make it shorter or longer. Expand the loop region so that it encompass the entire musical piece, like on figure 3.18.
Another thing to do is to add tempo marker and transitions, but we’ll do this later on to add more interactivity to our music.
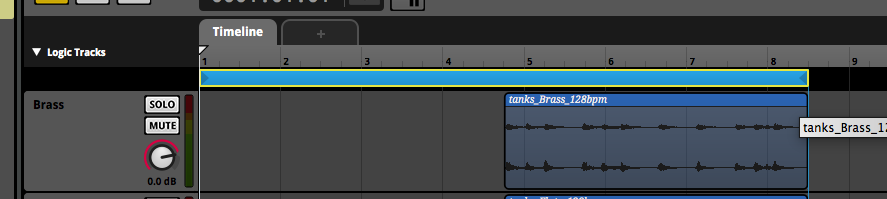
Figure 3.18
Now, if you click the play button again, you’ll notice that the music loops – it plays indefinitely. Go back to the Events tab now, on the left, and right-click on the name of the event. From the menu choose Assign to Bank | Master Bank. This will assign the event to the bank.
Save the project (File | Save) and build it (File | Build). Go back to Unity. Make sure you’ve opened the project you’ve integrated with FMOD earlier. In the Hierarchy panel, find the Main Camera game object. If you’ve imported the camera from standard assets, you should find the Main Camera within the MultipurposeCameraRig / Pivot object. There, turn off the Audio Listener component.
In the Inspector of the Main Camera object, click Add Component and use the search field to type FMOD. From the list of the components, choose FMOD Studio Listener. These components will be available to you once you successfully import the integration package. These components are basically C# scripts that control the sound but are dedicated for FMOD.
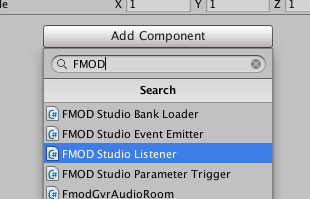
Figure 3.19
FMOD Studio Listener is similar to standard Audio Listener component built-in into Unity – this component listens for sounds. After adding this component to Unity, during testing the game you’ll see a debug window for FMOD in the left upper corner of the game screen. It shows some useful information, but we won’t talk about these in this game. Just know the window is there.
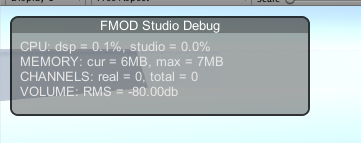
Figure 3.20
Now, create an empty game object on the screen and call it, for example, BackgroundMusic. Now we need to add an event to be played.

Figure 3.21
Select this new game object in the Hierarchy, and add a new component through the Inspector.
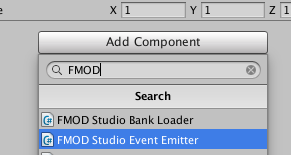
Figure 3.22
This time, add FMOD Studio Event Emitter. This is similar to Audio Source component in Unity. After adding this new component, you’ll notice it’s empty, but it displays a message Event Not Found.
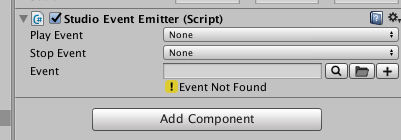
Figure 3.23
Let’s add the event now. First, click the looking glass icon on the right side of the “Event” field.
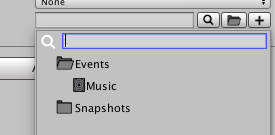
Figure 3.24
After clicking the looking glass icon, you’ll see a list with a search field, and some banks – these are the banks you’ve created in FMOD. Right now, there’s not much there, because we have just a master bank in our project. In my case, I’ve called the event Music, so this is what you see on figure 3.24. Click the event twice to select it. For now don’t worry about the stuff that will show in this component.

Figure 3.25
Now we’re just interested in configuring the Play Event. Click the dropdown menu next to Play Event, and choose Object Start. By choosing this option, you set the playback of the event so that it starts playing once the game object is started in the game engine.
After doing all of this, start the game, and you will hear the music playing. Even better, after few seconds you’ll notice that the music is looping and it plays indefinitely.
***
In this chapter you’ve learned how to create and build FMOD projects, and how to integrate them with Unity. You’ve learned how to create events, add sounds and work with logic tracks, looping the sounds. You’ve also learned how to listen to the sounds in Unity, and how to play them by using components. In the next chapter, you will learn more about interactive music.
Keep in mind that all these techniques can be used to play any sort of sound in Unity – by creating an event, assigning it to a bank, and selecting it in a emitter component.
Don't forget to become a fan on Facebook and subscribe to new posts via RSS or via email.
More from my site
 Interactive Game Music for Beginners with FMOD – Part 7
- Interactive Game Music for Beginners with FMOD – Part 6
- Interactive Game Music for Beginners with FMOD – Part 5
- Interactive Game Music for Beginners with FMOD – Part 2
- Interactive Game Music for Beginners with FMOD – Part 1
- Interactive Game Music for Beginners with FMOD – Part 4


